Creamy Cucumber Salad with Dill
Cool, creamy cucumber salad with dill, yoghurt and a touch of garlic. Crisp, refreshing and ready in 15 minutes — the perfect summer side dish for any meal.

Cool, creamy cucumber salad with dill, yoghurt and a touch of garlic. Crisp, refreshing and ready in 15 minutes — the perfect summer side dish for any meal.
Juicy garlic butter mushrooms with fresh parsley, golden and savoury in 20 minutes. A quick, rich side dish that goes with steak, chicken or pasta at home.

Cauliflower is one of those vegetables that people either love or think they do not like, and I used to be firmly in the second group. Boiled cauliflower at school put me off it for years, pale, soggy, and smelling faintly of a swimming pool. Then a friend served roasted cauliflower at dinner, golden at the edges, nutty and almost sweet, with a creamy tahini sauce and a squeeze of lemon, and I realised I had never actually tasted cauliflower cooked properly. This recipe is the one that changed my mind, and it has changed a few other minds since.
Roasting does something wonderful to cauliflower. The high heat caramelises the natural sugars, the edges go crisp and brown, and the flavour turns from bland and watery to nutty, sweet, and almost meaty. It is a complete transformation, and it takes nothing more than olive oil, salt, and a hot oven. The tahini sauce on top adds creaminess and a gentle sesame richness, and the lemon keeps the whole thing bright, so it never feels heavy or greasy.
I make this whenever I need a vegetable side that actually gets eaten, not just pushed around the plate. It works with roast chicken, grilled fish, and a big bowl of rice, and it is also substantial enough to be the main event, piled over grains or stuffed into a warm flatbread. It is cheap, it is healthy, and it is one of the easiest ways I know to make a vegetable the best thing on the table.
The best part is how little effort it takes. You cut the cauliflower into florets, toss them in oil and spices, roast them until golden, and whisk together a sauce that takes two minutes. There is no fancy technique, no special equipment, and no long list of ingredients. If you have a cauliflower sitting in the fridge and you are not sure what to do with it, this is what you should do with it.
This is the recipe that makes cauliflower taste like something you actually want to eat, not something you eat because it is good for you. Roasting brings out a sweetness you would never guess was there, and the browned edges taste almost like toasted nuts. The tahini sauce is creamy without being heavy, and the lemon and garlic in it cut through the richness, so every bite is balanced. It is a side dish that people ask about, which is not something I can say about many vegetables.
It is also a genuinely healthy dish that does not taste like a compromise. Cauliflower is low in calories, high in fibre, and a good source of vitamin C, and tahini adds healthy fats and a little protein. There is no cream, no cheese, and no heavy sauce, just good ingredients cooked well. If you are trying to eat more vegetables without feeling like you are on a diet, this is a very good place to start.
The recipe is flexible, too. You can make it spicy, smoky, or herby just by changing the spices, and you can serve it hot, warm, or at room temperature, which makes it perfect for a buffet or a packed lunch. It scales up easily for a crowd, it travels well, and the leftovers are excellent the next day. It is vegan, gluten-free, and dairy-free as written, so it suits almost everyone at the table without any special adjustments.
Start by heating the oven to 220 degrees Celsius, because cauliflower needs a properly hot oven to roast rather than steam. While it heats, cut the cauliflower into florets. I cut the head in half first, then cut out the thick core, and then break the rest into pieces roughly the size of a golf ball. Try to keep them similar in size so they cook evenly, and do not make them too small, because tiny pieces burn before the bigger ones are done. If a floret is very large, cut it in half through the stem so it stays in one piece.
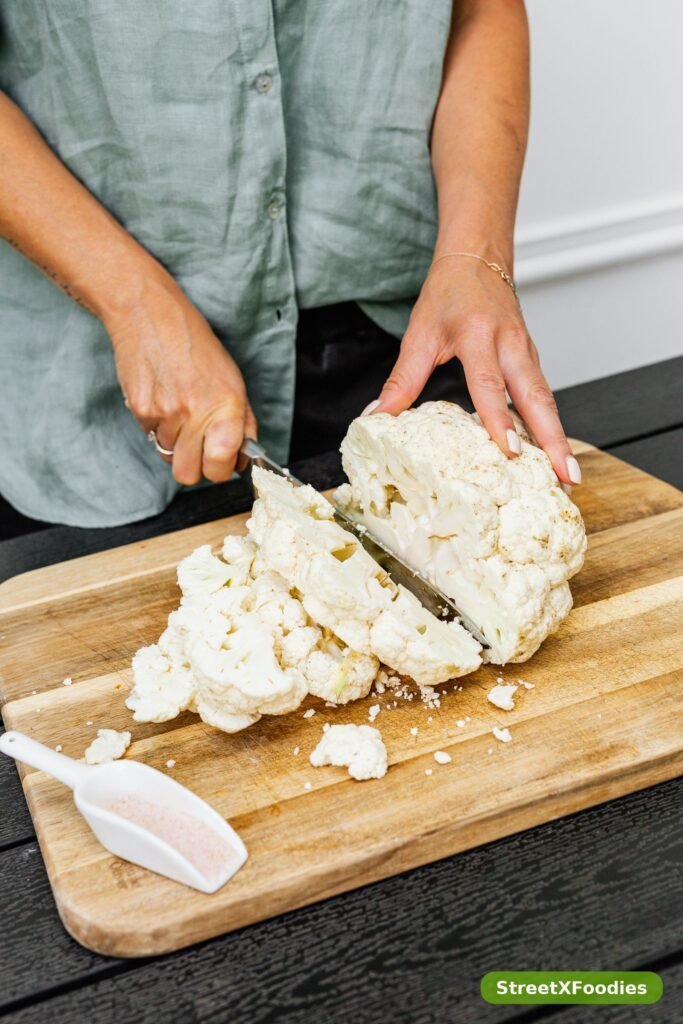
Put the florets in a large bowl and drizzle over the olive oil, then sprinkle over the cumin, smoked paprika, turmeric if you are using it, salt, and pepper. Toss everything together with your hands until every floret is coated, and do not be shy about getting oil into all the little nooks and crannies. The spices need the oil to stick, and the oil is what helps the edges crisp up. Spread the florets out on a large baking tray in a single layer, cut side down where you can, and leave space between them. If they are crowded, they will steam, and steamed cauliflower is exactly what we are trying to avoid.
Roast for twenty-five to thirty minutes, turning the florets once halfway through, until they are deep golden brown at the edges and tender in the middle. You should be able to slide a knife into the thickest part with no resistance, and the edges should look properly browned, not just pale gold. If they are still pale after thirty minutes, give them another five minutes, because colour is flavour here. A little charring on the edges is a good thing, and I always pick the darkest pieces for myself.
While the cauliflower roasts, make the tahini sauce. Put the tahini in a small bowl with the lemon juice, grated garlic, and a pinch of salt, and whisk it together. It will seize up and go thick and grainy at first, which alarms everyone the first time, but that is completely normal. Add cold water one tablespoon at a time, whisking after each addition, and it will suddenly turn smooth, pale, and creamy. Taste it, and add the honey if the lemon feels too sharp, or a little more lemon if it feels too rich. The sauce should be thick enough to coat a spoon, but thin enough to drizzle.
When the cauliflower is done, transfer it to a serving plate while it is still hot, and drizzle the tahini sauce generously over the top. Sprinkle with the chopped parsley, lemon zest, and pomegranate seeds if you are using them, and serve immediately. I like to put a little extra sauce in a small bowl on the side, because people always want more. The contrast between the hot, crispy cauliflower and the cool, creamy sauce is what makes this dish work, so do not wait too long to serve it.
Cut the florets evenly, and do not crowd the tray. These two things matter more than anything else, because they decide whether the cauliflower roasts or steams. Use your largest baking tray, and if you have to, use two trays rather than squeezing everything onto one. A hot oven is just as important, so give your oven time to reach 220 degrees before the tray goes in, and do not open the door every five minutes to check, because that drops the temperature.
Do not skimp on the oil. Cauliflower is a dry vegetable, and without enough oil it will dry out in the oven before it has a chance to brown. Three tablespoons sounds like a lot, but it is spread across a whole cauliflower, and it is what makes the edges crisp and golden. And season generously. Cauliflower is mild, and it needs salt and spice to taste like anything, so taste a floret after roasting and add more salt if it needs it. A final squeeze of lemon over the roasted cauliflower, before the sauce goes on, makes a surprising difference.
For the tahini sauce, the quality of the tahini matters. A good tahini is runny, pale, and pourable when stirred, while a bad one is thick, bitter, and hard to whisk. If your tahini is very thick, you may need a little more water than the recipe says, and that is fine. Whisk it patiently, adding water slowly, and it will come together. If it tastes bitter, a teaspoon of honey or maple syrup will balance it without making the sauce sweet.
It also helps to let the cauliflower cool for just a minute or two before you drizzle the sauce over it. If the florets are straight out of a very hot oven, the sauce thins out and slides off, while a minute of resting lets the edges firm up and the sauce cling properly. Serve the extra sauce in a small bowl on the side, so people can add more as they eat, and keep a lemon wedge on the plate for anyone who wants an extra squeeze. Those little touches are what turn a simple roasted vegetable into a dish people remember.
For a spicy version, add half a teaspoon of chilli flakes or a teaspoon of harissa paste to the oil before tossing the cauliflower. It gives the dish a warm heat that works beautifully with the cool tahini. For a curry-spiced version, swap the cumin and paprika for a teaspoon of garam masala and half a teaspoon of ground coriander, and finish with fresh coriander instead of parsley. The method stays exactly the same, and the flavour changes completely.
You can also roast the cauliflower whole, which looks spectacular on a dinner table. Trim the leaves, rub the whole head with the spiced oil, and roast it at 200 degrees for fifty to sixty minutes, until a knife slides in easily. Slice it into wedges at the table and drizzle with tahini sauce. For a heartier meal, toss the roasted florets with cooked chickpeas, quinoa, and a handful of spinach, and you have a warm salad that works as a main course. A scattering of toasted almonds or pine nuts adds crunch, and crumbled feta on top makes it richer if you are not keeping it vegan.
If you like a smoky flavour, try adding a teaspoon of smoked paprika and finishing the dish with a drizzle of chilli oil. You can learn more about how tahini is made and why it separates in the jar from Food52’s roasted cauliflower with tahini and pomegranate molasses, which covers the sauce well. For a street-food style plate, serve the cauliflower next to easy street style corn, spicy, buttery and delicious, where the sweet corn and the nutty cauliflower balance each other nicely.
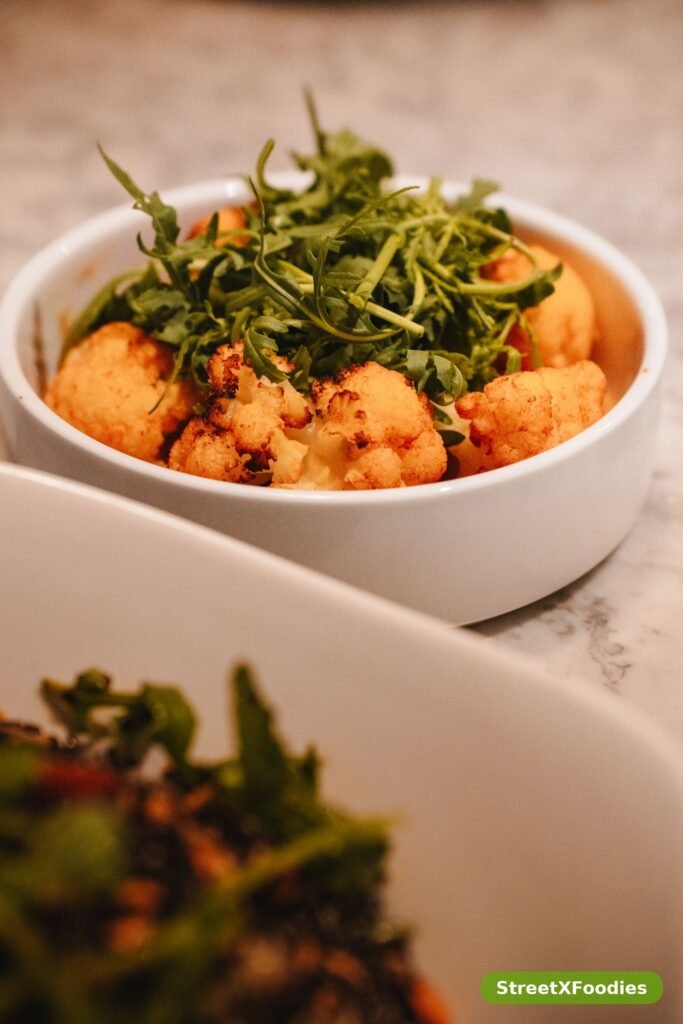
This cauliflower is wonderful as a side dish with roast chicken, grilled salmon, or lamb chops, because the tahini sauce works almost like a gravy, adding creaminess to the plate. I also serve it with rice and a simple salad for a light vegetarian dinner, and it is excellent piled into warm flatbreads with pickled onions and a little extra sauce, like a vegetarian kebab. For a buffet, serve it at room temperature on a large platter, with the sauce drizzled over the top and pomegranate scattered across it, because it looks beautiful and it holds up well.
For a more substantial meal, serve the cauliflower over a bowl of herbed couscous or quinoa, with a dollop of yoghurt and a handful of toasted seeds. It also works as part of a mezze spread, alongside hummus, flatbread, olives, and a tomato salad, where everyone can pick and choose. If you are serving a roast dinner, it makes a welcome change from the usual boiled vegetables, and it is usually the first side dish to disappear.
At a barbecue, roast the cauliflower while the meat is resting, and serve it warm with the rest of the spread. It goes especially well with one pan honey garlic pork chops with apples, where the sweet apples and the smoky cauliflower complement each other. For a quick lunch, reheat the leftovers and pile them into a wrap with salad and extra tahini sauce, and you have a meal that takes five minutes to put together.
Leftover roasted cauliflower keeps in an airtight container in the fridge for up to three days. Store the tahini sauce separately if you can, because the cauliflower stays crisper that way, and the sauce keeps for up to five days in a jar in the fridge. The sauce will thicken as it sits, so whisk in a teaspoon of cold water before serving to bring it back to a pourable consistency.
To reheat the cauliflower, spread it on a baking tray and roast it in a hot oven at 200 degrees for eight to ten minutes, until it is hot and the edges crisp up again. The microwave will warm it, but it will also make it soft, so the oven is the better choice. Do not freeze roasted cauliflower, because it goes watery and mushy when thawed. If you have a lot left over, turn it into soup instead: blend it with stock and a spoonful of tahini, and you have a lovely lunch for the next day.
Soggy cauliflower almost always means the tray was too crowded or the oven was not hot enough. Cauliflower releases water as it cooks, and if the florets are packed together, that water turns to steam and stops them browning. Use a large tray, leave space between the florets, and make sure your oven is properly hot at 220 degrees before the tray goes in. Also make sure the florets are dry before you oil them, because water on the surface stops the oil from doing its job. For a similar lesson in getting vegetables crisp, crispy smashed potatoes with garlic and herbs use the same principles of space and heat.
You can, but the result will not be quite as crisp as fresh cauliflower. Frozen cauliflower holds a lot of water, so thaw it completely, pat it very dry with a clean tea towel, and roast it at a high heat, giving it a few extra minutes. It works better in a warm salad or a grain bowl, where a little softness does not matter, than as a standalone side dish. If you can, use fresh cauliflower for this recipe, and save the frozen kind for soups and curries, where its texture does not matter.
Tahini sauce always goes thick and grainy when you first add lemon juice, and that is completely normal. The trick is to keep whisking and add cold water one tablespoon at a time, and it will suddenly turn smooth and creamy. If it is still grainy, your tahini may be old or of poor quality, and a fresh jar will make a big difference. A good tahini should be runny and pourable when stirred. You can read more about getting tahini sauce right in Food52’s golden roasted cauliflower with tahini recipe, which explains the whisking process clearly.
Yes, as written, this recipe is both vegan and gluten-free. The tahini sauce is made from sesame seeds, lemon, garlic, and water, with no dairy, and there is no flour or gluten in the dish at all. If you add the optional honey, it is no longer strictly vegan, so use maple syrup instead if that matters to you. The pomegranate and parsley garnish are optional, but they add colour and freshness, so I recommend them.
It goes with almost any roast meat, grilled fish, or grain-based meal. Try it with roast chicken, salmon, or lamb, or serve it as a main course over rice, couscous, or quinoa. It is also excellent in a wrap or flatbread, and as part of a mezze spread. For a street-food style dinner, serve it alongside chicken street food recipes for dinner, easy, crispy and flavourful, where the cauliflower adds a fresh, vegetable note to a rich meal.
Yes, you can roast the cauliflower up to a day ahead and keep it in the fridge, then re-crisp it in a hot oven for eight to ten minutes before serving. The tahini sauce can be made up to five days ahead and kept in a jar in the fridge, whisking in a little water before serving. Do not drizzle the sauce over the cauliflower until just before serving, because it will make the crispy edges go soft. For a party, roast the cauliflower an hour ahead and serve it at room temperature, which works perfectly.

Golden crispy smashed potatoes with garlic, butter and fresh herbs. Crunchy edges, fluffy middles, and the easiest impressive side dish for any dinner.

Soft, gooey homemade cinnamon rolls with warm cinnamon-sugar filling and tangy cream cheese frosting. A cozy bakery-style bake, made easy at home today.
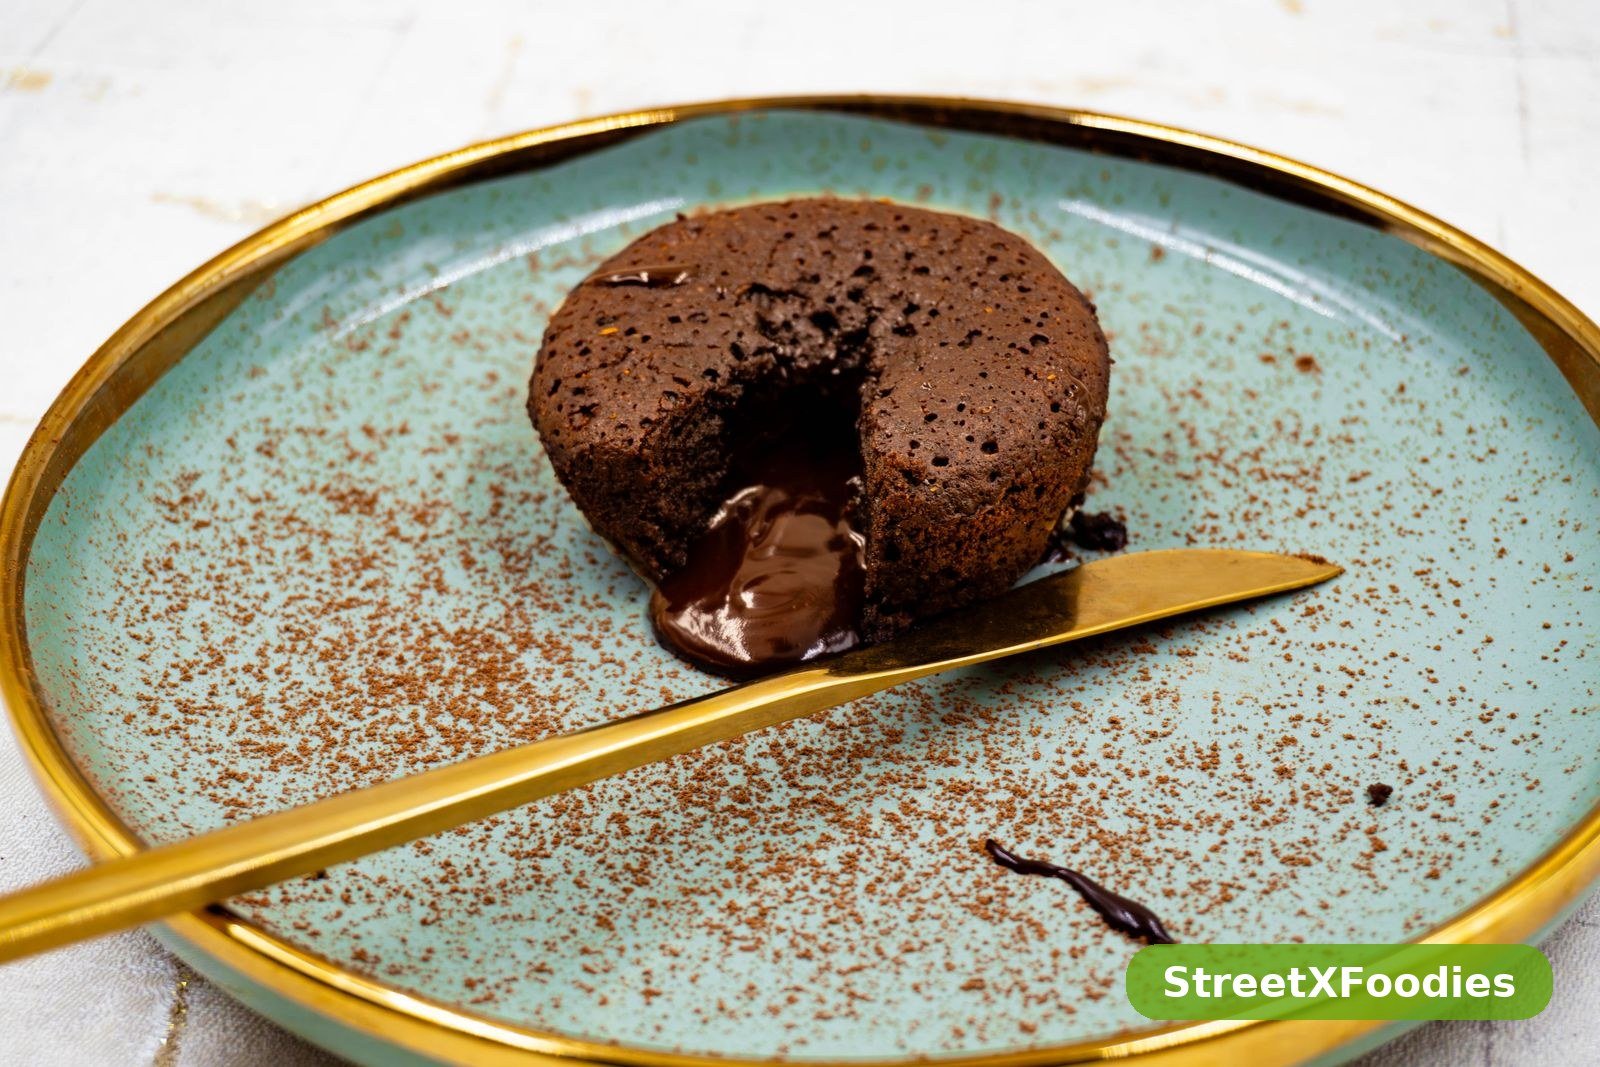
There is a moment, when you cut into a chocolate lava cake, that feels like pure theatre. The spoon breaks through the soft, dark cake, and the molten chocolate centre flows out slowly, pooling on the plate, and everyone at the table leans in a little closer. It is dramatic, it is indulgent, and it is one of the most satisfying desserts you will ever make at home. And the best part is that it is far easier than it looks.
I first made lava cakes for a dinner party, years ago, when I wanted a dessert that would impress my guests without keeping me in the kitchen all evening. I had heard that lava cakes were difficult, that they required precise timing and professional skill, and I was honestly a little nervous. Then I made them, and I realised the truth: a lava cake is essentially a small chocolate cake that you deliberately underbake, so the centre stays liquid. That is the whole secret. Once you understand that, the recipe becomes simple, forgiving, and wonderfully reliable.
What I love about lava cakes is how they make an ordinary evening feel special. They are individual, so everyone gets their own little cake, warm from the oven, with a scoop of ice cream melting slowly on top. They are quick — the batter comes together in about fifteen minutes, and the cakes bake in twelve — which means you can make them while your guests are finishing their main course. And they are deeply, intensely chocolatey, in a way that satisfies even the most serious chocolate lover.
This is my go-to recipe, the one I have made for birthdays, for Valentine’s Day, for dinner parties, and for quiet nights when only a molten chocolate cake will do. It uses good dark chocolate, real butter, and a simple method that works every time. If you have never made lava cakes before, do not be nervous. Follow the timing, trust the process, and you will be rewarded with a dessert that looks like it came from a restaurant and tastes like it came from someone who loves you.
The first reason to love these lava cakes is the drama of the molten centre. There is nothing quite like cutting into a warm cake and watching the chocolate flow out, and it never gets old, no matter how many times you make it. It is a dessert that makes people smile, and it turns a simple dinner into a memorable occasion. Children love it, adults love it, and even people who claim they are not dessert people will find themselves reaching for a spoon.
You will also love how quick and easy they are. The batter is made in one bowl, with no mixer required, and it comes together in about fifteen minutes. The cakes bake in twelve to fourteen minutes, which means you can go from deciding to make dessert to sitting down with a warm lava cake in less than half an hour. That is faster than ordering a takeaway, and infinitely more satisfying. And because the cakes are baked in individual ramekins, there is no slicing, no serving, no fuss — you just turn them out onto plates and serve them.
Then there is the flavour, which is rich, dark, and deeply chocolatey without being overly sweet. Good dark chocolate is the star here, and the recipe lets it shine. The cake part is soft and tender, almost like a brownie, and the molten centre is pure, liquid chocolate, warm and silky. A scoop of vanilla ice cream on top provides a cool, creamy contrast, and a dusting of cocoa or a few fresh berries adds a final touch of elegance. It is a dessert that is indulgent without being heavy, and sophisticated without being complicated.
Finally, lava cakes are wonderfully adaptable. You can make the batter ahead of time and keep it in the fridge, you can add a flavour twist like orange zest or espresso, and you can serve them in the ramekins or turned out onto plates. They are perfect for a dinner party, because you can prepare them in advance and bake them at the last minute, and they are perfect for a quiet night in, because the recipe makes just four cakes — enough for a small family, with no leftovers to worry about.
Start by heating your oven to 220 degrees Celsius, which is 425 degrees Fahrenheit, and preparing your ramekins. I use four six-ounce ramekins, which are the perfect size for an individual lava cake. Grease each ramekin generously with softened butter, making sure to coat the bottom and sides completely, and then dust the inside with cocoa powder, tapping out any excess. This butter and cocoa coating is what stops the cakes from sticking, and it is the reason you will be able to turn them out cleanly onto a plate. Place the prepared ramekins on a baking tray, which makes them easier to move in and out of the oven.
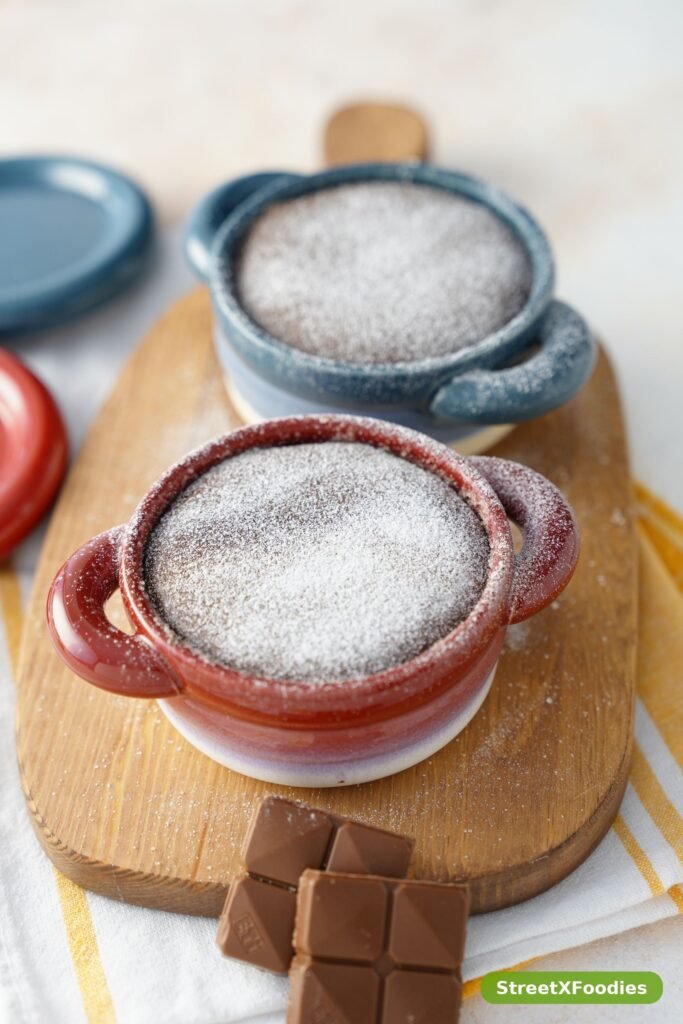
Now melt the chocolate and butter together, which is the foundation of the whole recipe. Put the chopped chocolate and the butter in a heatproof bowl, and melt them gently — either in the microwave in thirty-second bursts, stirring between each one, or over a pan of simmering water, making sure the bottom of the bowl does not touch the water. Stir the mixture until it is completely smooth and glossy, with no lumps of chocolate left. The smell at this stage is wonderful, rich and dark and inviting, and it is a good sign that you are on the right track. Set the bowl aside to cool for a few minutes, so it is warm rather than hot when you add the eggs.
In a separate large bowl, whisk the eggs, egg yolks, sugar, vanilla, and salt together until the mixture is pale, thick, and slightly frothy. This takes about two to three minutes by hand, and you are looking for a mixture that has lightened in colour and increased slightly in volume. The sugar should be mostly dissolved, and the mixture should feel smooth rather than gritty. Pour the warm chocolate mixture into the egg mixture in a slow stream, whisking constantly as you pour, so the eggs do not cook from the heat of the chocolate. Then add the flour, and fold it in gently with a spatula until it is just incorporated — do not overmix, because overmixing will make the cakes tough.
Divide the batter evenly between the prepared ramekins, filling each one about three-quarters full. The batter should be thick and glossy, and it should pour slowly rather than running. At this point, you can either bake the cakes immediately, or cover the ramekins with cling film and refrigerate them for up to twenty-four hours, which is a wonderful option if you are preparing for a dinner party. If you are baking them from the fridge, add two minutes to the baking time, and let them sit at room temperature for ten minutes before they go in the oven.
Bake the cakes for twelve to fourteen minutes, until the edges are firm and set but the centres still look soft and slightly jiggly when you gently shake the tray. This is the crucial moment, and it is the one that makes people nervous, but it is easier than it sounds. The top of each cake should look set and slightly cracked, like a brownie, and the sides should have pulled away very slightly from the ramekin. If you are unsure, it is better to underbake slightly than to overbake — an underbaked lava cake is still a delicious molten cake, while an overbaked one is just a small chocolate cake with no lava at all.
Take the cakes out of the oven and let them sit for exactly one minute. This short rest lets the edges firm up just enough to hold their shape when you turn them out, while the centres stay molten. Run a thin knife around the edge of each ramekin, place a small plate on top, and flip the ramekin and plate over together in one confident motion. Lift the ramekin off slowly — the cake should slide out cleanly, and if it does not, give it a gentle tap on the bottom. Dust the top with a little powdered sugar, add a scoop of vanilla ice cream and a few fresh berries, and serve immediately, while the centres are still warm and flowing.
If you want to understand the technique in more depth, this chocolate lava cake recipe from Serious Eats is an excellent guide, and it explains the science of the molten centre in a way that will give you confidence every time you bake these cakes.
Use good-quality dark chocolate, because it is the main flavour in the cake and there is nowhere for poor chocolate to hide. A chocolate with about seventy percent cocoa is ideal — it is rich and dark without being bitter, and it melts into a smooth, glossy batter. Avoid chocolate chips, which contain stabilisers that stop them from melting smoothly, and avoid milk chocolate, which will make the cakes too sweet and will not give you that deep, dark flavour. A bar of good dark chocolate, chopped into small pieces, is the best choice.
Do not overbake the cakes, because that is the one mistake that will turn a lava cake into an ordinary chocolate cake. Set a timer, and check the cakes at twelve minutes. The edges should be set and the centres should still jiggle slightly — that jiggle is the molten chocolate, and it is exactly what you want. Every oven is slightly different, so the first time you make these, watch them carefully and note the exact time that works for your oven. Once you know your timing, you will be able to make them perfectly every time.
Grease and dust the ramekins properly, because a cake that sticks to the ramekin is a cake that will not turn out cleanly. Use softened butter, not melted butter, and coat every part of the inside, including the rim. Then dust with cocoa powder, not flour, because cocoa will not leave a white residue on the finished cakes. Tap out the excess cocoa, and make sure there are no bare patches. If you are nervous about turning the cakes out, you can also serve them in the ramekins, with a spoon — they will taste just as good, and nobody will mind.
Let the cakes rest for exactly one minute before you turn them out. Less than a minute, and they may be too soft to hold their shape. More than two minutes, and the residual heat will continue to cook the centres, and you will lose some of that glorious molten flow. One minute is the sweet spot, and it is worth setting a timer for it. And serve them immediately — lava cakes wait for no one, and the molten centre will start to firm up as the cake cools, so get them to the table while they are still warm and flowing.
For a flavour twist, add a teaspoon of instant espresso powder to the melted chocolate, which deepens the chocolate flavour without making the cakes taste like coffee. Or add the zest of half an orange to the batter, for a classic chocolate-orange combination that is elegant and fragrant. A pinch of chilli powder or cayenne pepper gives the cakes a warm, spicy kick that is surprisingly delicious, and a tablespoon of liqueur — Grand Marnier, Kahlúa, or Amaretto — adds a sophisticated, grown-up note.
You can also hide a surprise in the centre of each cake. Drop a square of white chocolate, a spoonful of peanut butter, or a few raspberries into the middle of the batter before baking, and they will melt into a delicious surprise when the cake is cut open. A salted caramel centre, made by dropping a soft caramel into the batter, is particularly indulgent, and it pairs beautifully with the dark chocolate. These little twists make the cakes feel even more special, and they are a wonderful way to personalise the recipe for a special occasion.
For a different presentation, bake the cakes in a muffin tin instead of ramekins, using the same method but reducing the baking time by a minute or two. Or make mini lava cakes in small ramekins for a bite-size dessert that is perfect for a party buffet. If you love make-ahead desserts, this classic tiramisu with mascarpone cream is another elegant option that can be prepared the day before, and it uses a similar philosophy of simple ingredients and careful timing.
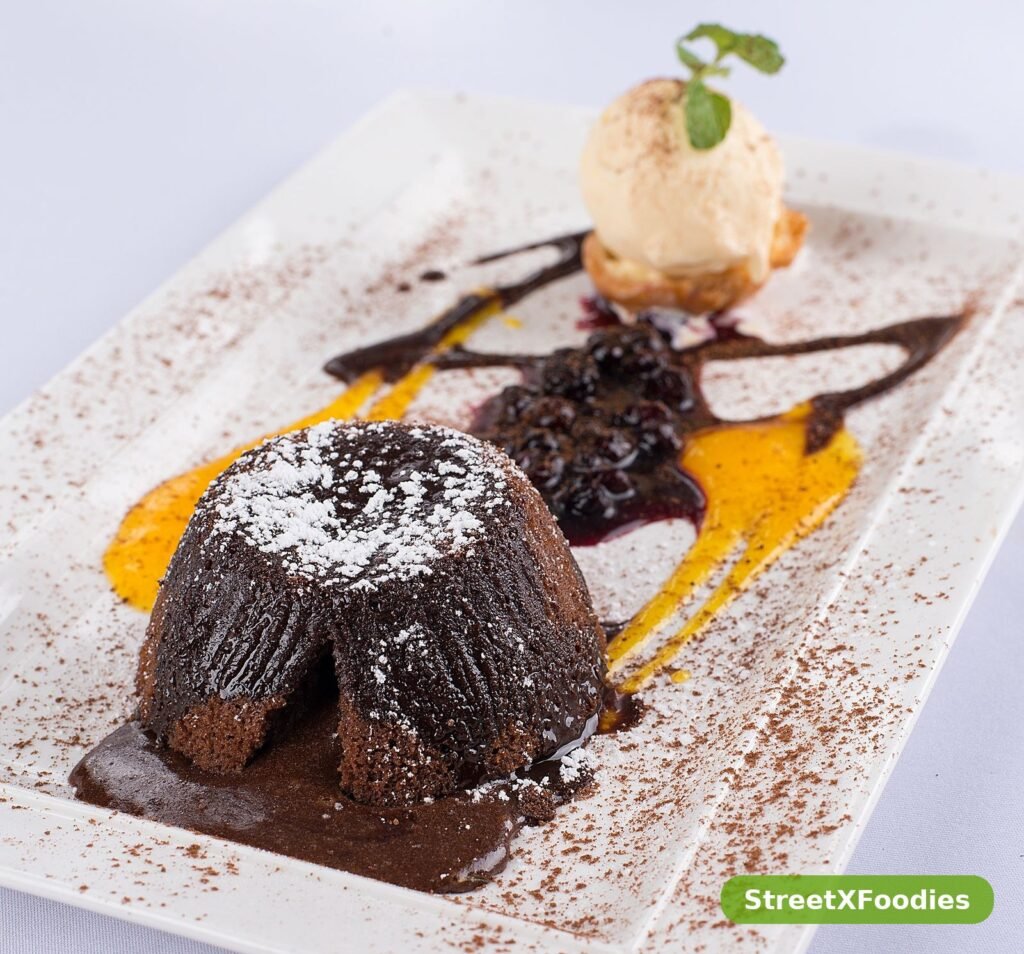
Lava cakes are at their best served warm, straight from the oven, with a scoop of vanilla ice cream melting slowly on top. The contrast between the warm, flowing chocolate and the cold, creamy ice cream is one of the great pleasures of this dessert, and it is the way I serve them almost every time. A few fresh raspberries or strawberries add colour and a tart contrast, and a dusting of powdered sugar makes the plate look like it came from a restaurant. A sprig of mint is a lovely final touch, if you have it.
For a dinner party, I like to serve lava cakes as the final course after a lighter main, because they are rich enough to feel indulgent but small enough not to overwhelm. They pair beautifully with a simple main course — if you are planning a full menu, these easy street food recipes at home make a fun, flavourful start, and the lava cakes provide a dramatic, chocolatey finish. A glass of dessert wine, a cup of coffee, or a small glass of port is lovely alongside, and a pot of tea works just as well.
If you are serving lava cakes for a special occasion, you can make the dessert even more memorable by serving them on warmed plates, with a drizzle of raspberry sauce or salted caramel around the edge of the plate. A little edible gold leaf, if you are feeling extravagant, will make them look truly spectacular. But honestly, a warm lava cake, a scoop of ice cream, and a few berries are all you really need — the cake itself is the star, and it does not need much help to shine.
Lava cakes are best eaten fresh from the oven, and I would always recommend baking them just before serving if you possibly can. That said, the batter can be made ahead and stored in the fridge, which is the next best thing. Pour the batter into the prepared ramekins, cover them tightly with cling film, and refrigerate them for up to twenty-four hours. When you are ready to bake, let them sit at room temperature for ten minutes, then bake them as usual, adding two minutes to the baking time.
If you have baked lava cakes left over, which is rare in my house, you can store them in the fridge for up to two days in an airtight container. The centres will firm up as they cool, so they will not be molten when you reheat them, but they will still be delicious — more like a small, rich chocolate cake. To reheat, warm them gently in the microwave for twenty to thirty seconds, or in a low oven for five minutes, until they are warm all the way through. Serve them with ice cream, as usual, and nobody will mind that the centre is no longer flowing.
I do not recommend freezing baked lava cakes, because the texture suffers and the molten centre is lost. If you do want to freeze them, freeze the unbaked batter in the ramekins, wrapped tightly, for up to a month, then defrost them overnight in the fridge and bake them as usual. The results will be almost as good as fresh, and it is a handy trick if you want to have lava cakes ready to bake at a moment’s notice.
The cakes are done when the edges are firm and set, the tops look dry and slightly cracked, and the centres still jiggle slightly when you gently shake the tray. This usually takes twelve to fourteen minutes in a hot oven. If you are unsure, it is better to take them out a minute early than a minute late — an underbaked cake will still have a molten centre, while an overbaked cake will not. The first time you make them, check at twelve minutes and note the time that works for your oven.
Yes, and it is one of the best things about this recipe. Make the batter, divide it between the prepared ramekins, cover them tightly with cling film, and refrigerate them for up to twenty-four hours. When you are ready to bake, let the ramekins sit at room temperature for ten minutes, then bake them as usual, adding two minutes to the baking time. This makes lava cakes perfect for a dinner party, because you can do all the preparation in advance and bake them at the last minute.
You can use any small, oven-safe dish — a muffin tin, a small ceramic bowl, or even a heatproof teacup. A muffin tin works well, though you should reduce the baking time by a minute or two, because the cakes will be smaller. Make sure to grease and dust whatever dish you use, just as you would a ramekin, and let the cakes rest for a minute before turning them out. If you are using a muffin tin, you may find it easier to serve the cakes in the tin, with a spoon, rather than trying to turn them out.
The most common reason is overbaking. Even one extra minute in the oven can be enough to cook the centre through, so set a timer and check the cakes at twelve minutes. Another possibility is that your oven runs hot — try reducing the temperature by ten degrees next time, or baking for a minute less. Make sure you are using the correct size ramekins, too, because larger ramekins will need longer in the oven, and smaller ones will need less. And remember that the cakes continue to cook in the residual heat after you take them out, so let them rest for only one minute before turning them out.
Eggs are important in this recipe, because they provide the structure that holds the cake together while the centre stays liquid. An eggless version is difficult to get right, though you can try using a commercial egg replacer or a mixture of yoghurt and baking powder. The results will be different — the cakes may be denser, and the molten centre may be less pronounced — but they can still be delicious. If you need an eggless chocolate dessert, a chocolate mousse or a flourless chocolate cake might be a better choice. For more dessert ideas, these easy lemon bars with shortbread crust are egg-based but simple, and the King Arthur guide to chocolate lava cakes has helpful notes on the role of eggs in the recipe.
Vanilla ice cream is the classic accompaniment, and it is my first choice every time. The cold, creamy ice cream against the warm, flowing chocolate is a perfect contrast, and it is hard to beat. Fresh berries, whipped cream, and a dusting of powdered sugar are also wonderful. For a more elaborate presentation, serve the cakes with a raspberry sauce, a salted caramel sauce, or a spoonful of crème fraîche. And if you are planning a full menu, these quick street food recipes with simple ingredients are a great way to start the evening before a rich chocolate finish.

Easy lemon bars with shortbread crust, a tangy lemon filling, and a dusting of powdered sugar — bright, buttery, and simple to make at home today for everyone.
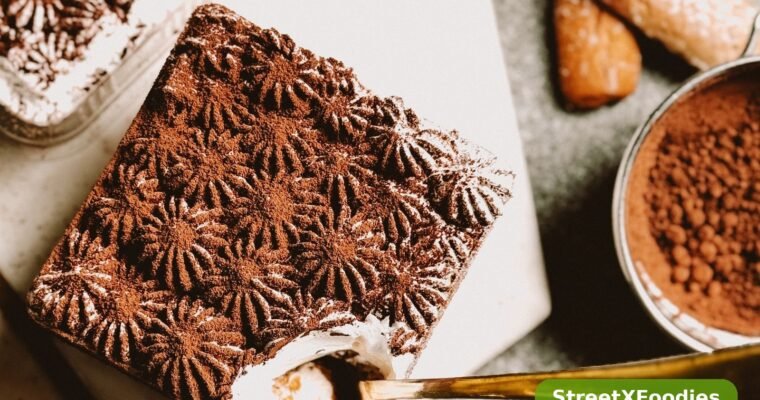
Classic tiramisu with mascarpone cream, coffee-soaked ladyfingers, and cocoa dusting — a make-ahead Italian dessert that tastes even better the next day.
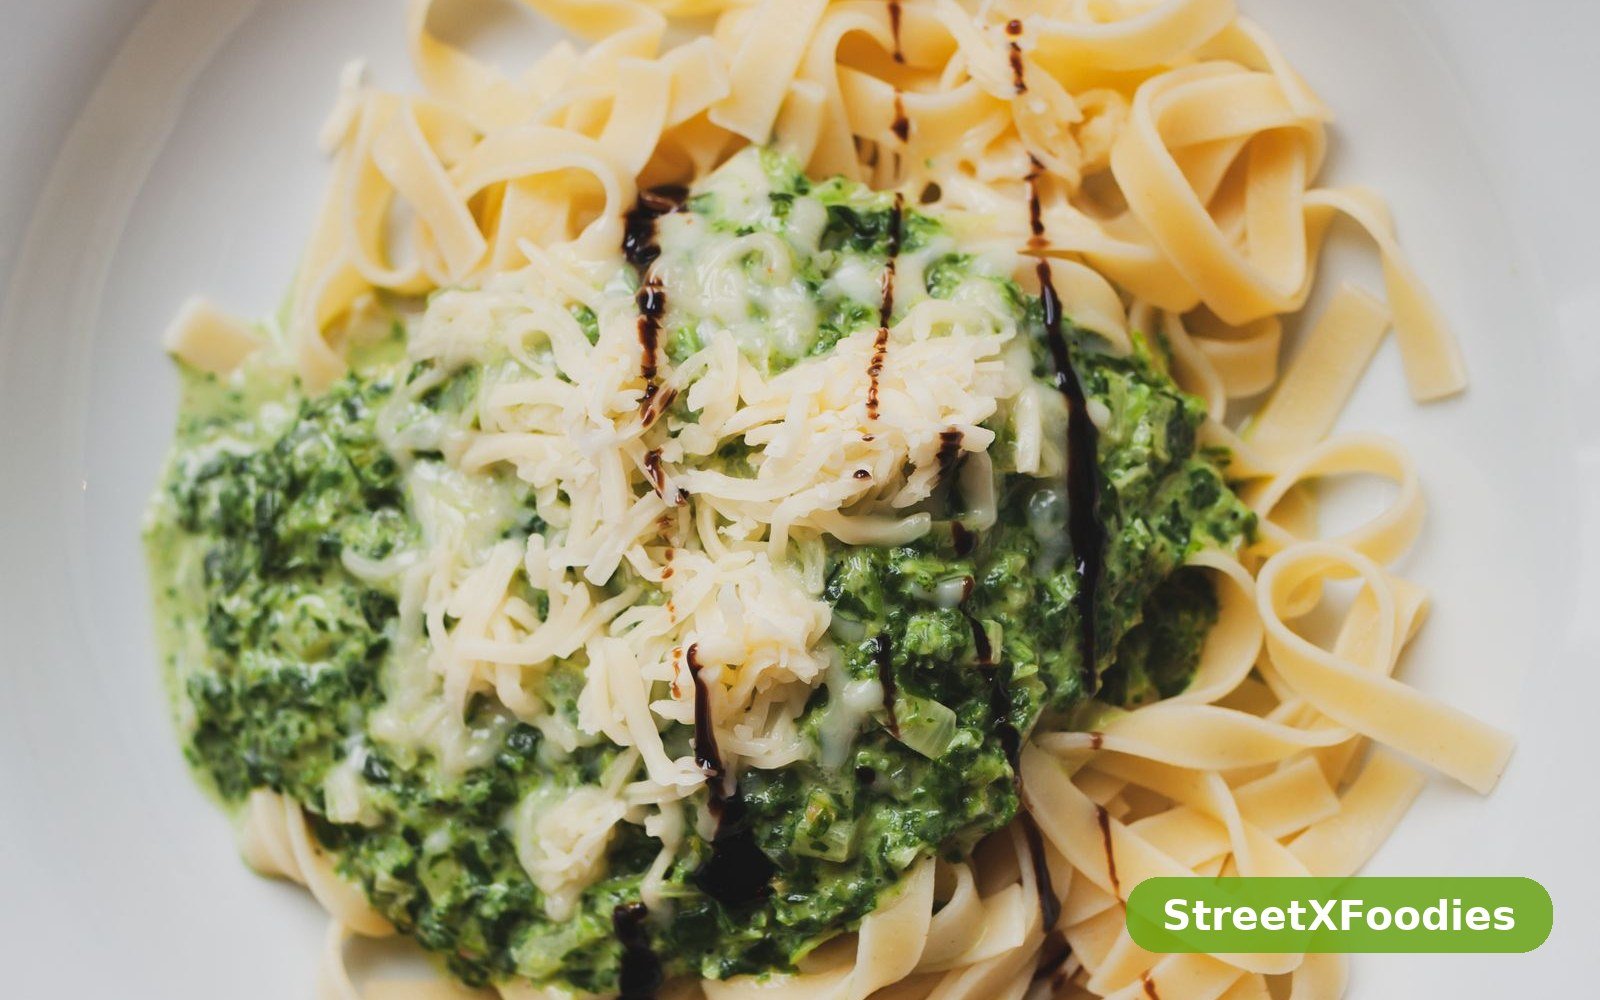
Some dinners are born out of a plan, and some are born out of an almost-empty fridge and a very hungry family. This creamy spinach and artichoke pasta belongs firmly in the second group, and it has become one of my most-requested meals anyway. I remember the evening clearly: I had a bag of spinach that needed using, a jar of artichoke hearts at the back of the cupboard, half a block of cream cheese, and a box of pasta. I threw them together in one pan, half expecting a perfectly ordinary dinner, and instead I ended up with something so good that my family asked for it again the very next week.
That is the thing about spinach and artichoke dip — the flavours are already a proven combination, rich and garlicky and cheesy, with that lovely tang from the artichokes cutting through the creaminess. Turning it into a pasta dinner was not a stroke of genius so much as a stroke of common sense. The pasta cooks right in the sauce, soaking up flavour as it goes, and the starch it releases helps the sauce turn silky without any fuss or extra thickeners. It tastes like comfort food and it eats like a proper meal, with actual vegetables in it, which makes me feel a little less guilty about the second helping.
I make this on nights when I want something that feels a bit special but I do not have the energy for a complicated recipe. It is a one-pan dinner, it takes about half an hour from start to finish, and it uses mostly pantry and fridge staples. The spinach wilts down into the sauce, the artichokes go soft and tangy, the garlic and Parmesan do their usual magic, and the whole thing comes together into a creamy, golden pan of pasta that looks like it came from a restaurant and tastes like it came from someone who really cares about feeding people well.
If you have ever stood in front of the fridge at six o clock wondering what on earth to cook, keep this recipe in your back pocket. It is forgiving, it is fast, it is endlessly adaptable, and it has saved more of my weeknights than I can count. And if you have children who claim they do not like spinach, this is the dish that might just change their minds — the spinach hides in the creamy sauce in the best possible way.
The first reason to love this pasta is the obvious one: it is all made in one pan. You sauté the garlic, wilt the spinach, cook the pasta in the broth and cream, and finish the sauce, all without ever touching a colander or a second pot. The pasta water, which you would normally pour down the sink, stays in the pan and becomes part of the sauce, giving it body and a beautiful silky texture. Fewer dishes, better sauce — it is hard to argue with that.
The second reason is the flavour. This is not a bland, pale creamy pasta. The garlic is cooked until fragrant, the artichokes bring a bright, briny tang, the Parmesan adds a salty, nutty depth, and a squeeze of lemon at the end lifts the whole dish. The spinach, which wilts down to almost nothing, adds an earthy sweetness that balances the richness. Every mouthful has something going on — creamy, tangy, garlicky, cheesy — and nothing about it tastes like a shortcut, even though it is one.
You will also love how quick it is. From the moment you put the pan on the heat to the moment you are sitting down to eat, you are looking at about thirty minutes, and most of that time the pasta is simply simmering away while you tidy the kitchen or set the table. It is the kind of recipe that fits real life, where dinner needs to happen between work and homework and everything else, and it still feels like a proper, cooked-from-scratch meal.
Finally, it is a wonderfully adaptable recipe. You can add chicken, leave out the artichokes, swap the spinach for kale, or use whatever pasta shape you have in the cupboard. It works as a meat-free main course, it works as a side dish, and it works as a base for leftovers. Once you have made it a couple of times, you will start to make it your own without even thinking about it, which is the mark of a recipe that truly belongs in your regular rotation.
Start by preparing your ingredients, because this recipe moves quickly once the pan is hot. Drain and chop the artichoke hearts, slice the garlic, dice the onion, and grate the Parmesan if you are using a block — freshly grated Parmesan melts far more smoothly than the pre-grated kind, which can turn grainy in a cream sauce. Cut the cream cheese into cubes so it melts quickly, and have the broth and cream measured and ready to pour. The spinach can go in straight from the bag, and you do not need to chop it, because it wilts down so much.
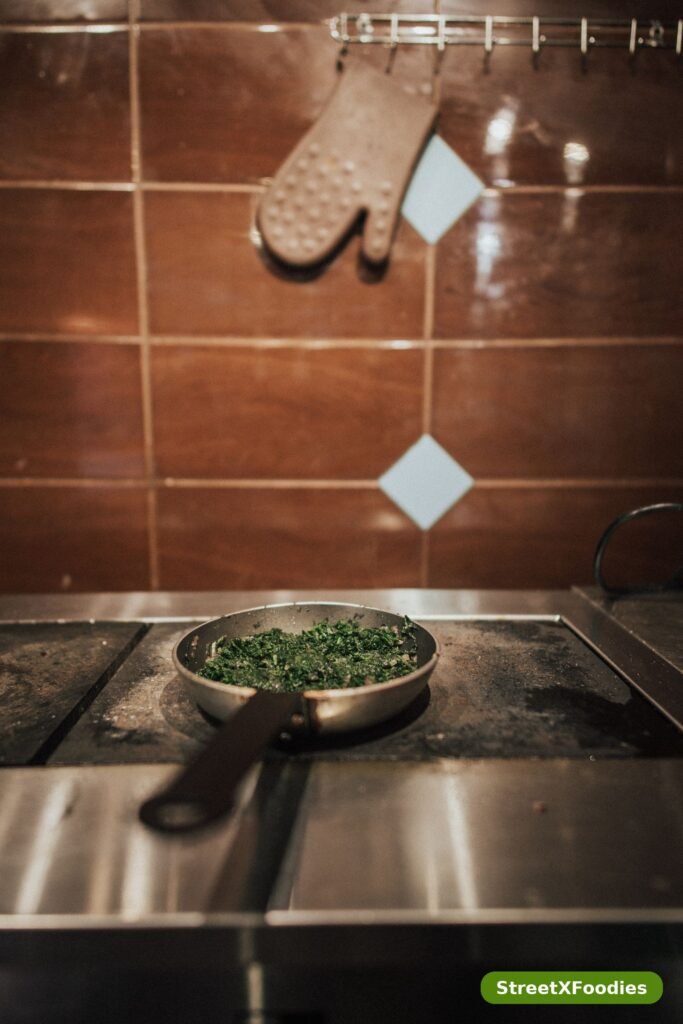
Warm the olive oil and butter in a large, deep skillet or a wide shallow pot over medium heat. When the butter has melted and is just starting to foam, add the diced onion and cook it gently for three to four minutes, until it is soft and translucent. Add the sliced garlic and the red pepper flakes, and cook for another minute, stirring constantly, until the garlic smells fragrant and sweet. Garlic burns quickly, so keep the heat moderate here and do not walk away — a minute of inattention is all it takes to turn sweet garlic bitter, and bitter garlic will haunt the whole pan.
Add the artichoke hearts and the Italian seasoning, and cook for two minutes, letting the artichokes pick up a little colour and warmth. Then add the spinach, a handful at a time, stirring it through until each handful wilts down before you add the next. It looks like an impossible amount of spinach at first, a great green mountain in the pan, but it collapses down to almost nothing within a couple of minutes. This is one of my favourite moments in cooking, watching that huge pile of leaves turn into a small, dark green tangle that is ready to disappear into the sauce.
Pour in the broth and the heavy cream, and bring the mixture to a gentle simmer, scraping the bottom of the pan to lift up any browned bits. Add the pasta, making sure it is mostly submerged in the liquid, and season with the salt, black pepper, and nutmeg. Turn the heat down to medium-low, put the lid on, and let the pasta cook for twelve to fourteen minutes, stirring every three or four minutes so the pasta does not stick to the bottom of the pan. The pasta will absorb the liquid as it cooks, and the sauce will thicken naturally as the starch is released, so do not worry if it looks a little thin at first — it comes together in the last few minutes.
When the pasta is just tender — taste a piece, because packet times are only a guide — turn the heat down to low and add the cubes of cream cheese, stirring gently until they melt completely into the sauce. Then add the grated Parmesan, a handful at a time, stirring after each addition until it has melted before you add the next. This slow, patient approach is what gives you a smooth, glossy sauce instead of a clumpy one. If the sauce looks too thick at this point, add a splash of broth or a little hot water, a tablespoon at a time, until it loosens to a silky consistency that coats the pasta rather than sitting on top of it.
Take the pan off the heat and stir in the lemon zest and lemon juice. The lemon might seem like a small detail, but it is the thing that makes the whole dish taste bright and alive instead of heavy. Taste the pasta and adjust the seasoning — a little more salt, a little more Parmesan, a pinch more red pepper flakes if you like heat. Let the pasta rest for two or three minutes before serving, so the sauce can settle and cling to every piece. Serve it in warm bowls, scattered with extra Parmesan and chopped fresh basil or parsley, and pass the pepper grinder around the table.
If you would like to understand how a good cream sauce is built from the ground up, the pasta recipes in this BBC Good Food pasta collection are a wonderful place to browse, and they show just how many directions a simple pan of pasta can go in.
Use freshly grated Parmesan if you possibly can, because it makes a genuine difference to the sauce. Pre-grated Parmesan is coated in anti-caking agents that stop it from melting smoothly, and in a cream sauce that can mean a grainy, slightly gritty texture. A small block of Parmesan and a box grater take less than a minute, and the result is a sauce that is noticeably silkier and more flavourful. The same goes for the cream cheese: let it come to room temperature before you start, so it melts quickly and evenly.
Do not overcook the pasta. Because it finishes cooking in the sauce and keeps cooking in the residual heat after you take the pan off the stove, you want to stop when it is just tender, with the tiniest bit of bite left in the middle. If you cook it until it is completely soft in the pan, it will turn mushy by the time it reaches the table. Taste a piece at twelve minutes, and trust your own mouth more than the time on the packet.
Stir the pasta regularly while it simmers, but gently. Pasta cooking in a shallow pan of sauce is much more likely to stick than pasta cooking in a big pot of water, so a stir every three or four minutes is essential. Use a wooden spoon and scrape the bottom of the pan, especially around the edges where the pasta tends to settle. If the liquid seems to be disappearing too fast before the pasta is done, add a splash of broth or hot water — it is far better to add a little liquid than to end up with pasta that is stuck and undercooked.
Finally, do not skip the lemon. Creamy pasta can easily become heavy and one-note, and a little acid is what keeps it balanced and makes you want a second helping. Lemon zest adds fragrance without much sourness, and the juice adds brightness. If you do not have a lemon, a splash of white wine vinegar or a spoonful of the brine from the artichoke jar can do a similar job in a pinch, though lemon is my first choice every time.
For a heartier version, add cooked chicken. Leftover roast chicken, shredded and stirred in at the end, is perfect here, and it turns the pasta into a complete one-pan meal with plenty of protein. If you want to cook the chicken fresh, dice a couple of boneless chicken breasts or thighs, brown them in the pan before you cook the onion, and set them aside to add back in with the Parmesan. The chicken picks up all the garlicky, creamy flavour of the sauce, and it is a great way to use up leftovers.
If you are not a fan of artichokes, you can leave them out and add a cup of sliced mushrooms instead, cooked with the onion until they are golden. Or add a handful of sun-dried tomatoes, chopped, for a sweet, tangy contrast that works beautifully with the spinach. A cup of frozen peas stirred in with the Parmesan adds colour and sweetness, and children tend to love them. The base sauce is so forgiving that you can swap the vegetables around almost endlessly.
For a lighter version, use half-and-half instead of heavy cream and reduce the cream cheese to two ounces, adding a little extra Parmesan for flavour. The sauce will be slightly thinner, but still creamy and satisfying, especially if you let the pasta cook a minute longer so more starch is released. You can also swap the baby spinach for chopped kale, though kale needs a few extra minutes to soften, so add it with the onion rather than later. And if you like a little heat, this pasta pairs beautifully with a crispy chicken quesadilla on the side for a Tex-Mex-inspired dinner.
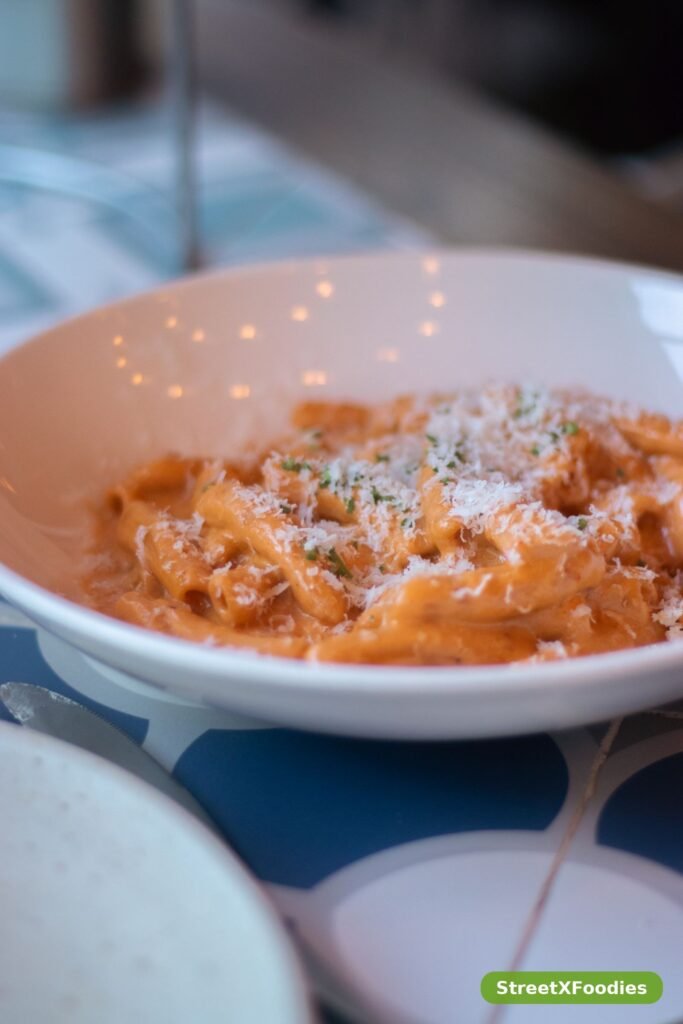
This pasta is a meal in itself, but it loves a little company. A simple green salad with a lemon vinaigrette is the perfect partner, because the sharp dressing cuts through the richness of the cream sauce. Warm garlic bread, or a crusty baguette for mopping up the sauce, is almost mandatory in my house — nobody wants to leave a drop of that creamy sauce behind in the bowl. A glass of white wine, or a sparkling lemonade for the children, rounds the meal out nicely.
For a bigger gathering, I like to serve this pasta alongside a platter of homemade crispy chicken bites, which add a crunchy, savoury contrast to the soft, creamy pasta. Or, if you are planning a full spread, a baked chicken cordon bleu with Dijon sauce makes an elegant main course with the pasta as a rich side dish. The pasta also works beautifully as part of a buffet, kept warm in a low oven with a splash of cream stirred through just before serving.
Leftover creamy pasta will keep in the fridge for up to three days in an airtight container, though I will be honest and say it is at its absolute best on the day it is made. Cream sauces thicken as they cool, and the pasta continues to absorb liquid, so the leftovers will look much thicker and drier than they did when they were fresh. That is completely normal, and it is easy to fix when you reheat it.
To reheat, put the pasta in a pan over a low heat with a generous splash of milk, cream, or broth — about two tablespoons per serving — and warm it gently, stirring often, until it is hot all the way through. The extra liquid loosens the sauce back to a silky consistency. In the microwave, heat it in short bursts, stirring between each one, and add a splash of milk if it looks dry. Avoid reheating it on a high heat, which can cause the cream sauce to split and turn grainy.
I do not recommend freezing this pasta, because cream sauces and cooked pasta both suffer in the freezer. The sauce can split when it thaws, and the pasta can turn soft and mushy. If you do need to freeze it, freeze it in single portions, defrost it overnight in the fridge, and reheat it very gently with a splash of cream, whisking as you go to bring the sauce back together. It will not be quite as good as fresh, but it will still be a perfectly decent lunch.
Yes, frozen spinach works well, and it is a great pantry standby. Defrost it completely and squeeze out as much water as you possibly can before you add it to the pan — a handful at a time, squeezing hard over the sink. If you skip this step, the extra water will thin the sauce and make the pasta watery. Use about ten ounces of frozen spinach to replace five ounces of fresh, and add it after the artichokes, cooking it for a couple of minutes before you pour in the broth.
Short, sturdy shapes with ridges or curves are best, because they hold the creamy sauce in all their nooks and crannies. Penne, rigatoni, fusilli, and farfalle are all excellent choices. I would avoid long, thin shapes like spaghetti or angel hair, because they tend to clump together when cooked in a shallow pan of sauce, and they are harder to stir without breaking. If you only have spaghetti, break it in half before adding it, and stir it very gently.
You can, though the cream cheese is what gives the sauce its lovely tang and body. If you leave it out, increase the heavy cream by half a cup and add an extra quarter cup of Parmesan, and let the sauce simmer for a couple of extra minutes to thicken. A spoonful of mascarpone or a soft goat cheese can also stand in for cream cheese, and each will give the sauce a slightly different character. The result will be a little less rich, but still creamy and delicious.
Yes, as long as you use vegetable broth, this pasta is completely vegetarian. The Parmesan is the only ingredient to check, because traditional Parmesan is made with animal rennet — if that matters to you, look for a vegetarian hard cheese labelled as suitable for vegetarians. The rest of the ingredients, including the cream, cream cheese, spinach, and artichokes, are naturally vegetarian, and the dish is hearty enough to serve as a main course without any meat at all.
A grainy sauce is usually caused by the cheese being added when the pan is too hot, or by using pre-grated Parmesan. Cheese sauces need gentle heat — if the sauce is boiling hard when you add the Parmesan, the proteins tighten up and the sauce turns grainy. Turn the heat down to low before you add the cheese, add it a handful at a time, and stir until each handful has melted before you add the next. If the sauce does turn grainy, a splash of warm cream and a vigorous whisk can sometimes bring it back.
Absolutely, and it is one of my favourite variations. Stir in two cups of cooked, shredded chicken — leftover roast chicken is perfect — along with the Parmesan, and let it warm through for a couple of minutes. Or cook diced chicken in the pan at the start, before the onion, and add it back at the end. For more chicken inspiration, this chicken Marsala with mushrooms and cream uses a similar creamy, garlicky sauce, and the techniques you learn there will serve you well here. If you want more ideas for using spinach in pasta, this guide to creamy spinach and artichoke pasta from The Kitchn is well worth a read.

One-pan shrimp and sausage jambalaya with smoky sausage, plump shrimp, and perfectly seasoned rice — an easy Louisiana-style dinner in one skillet tonight.