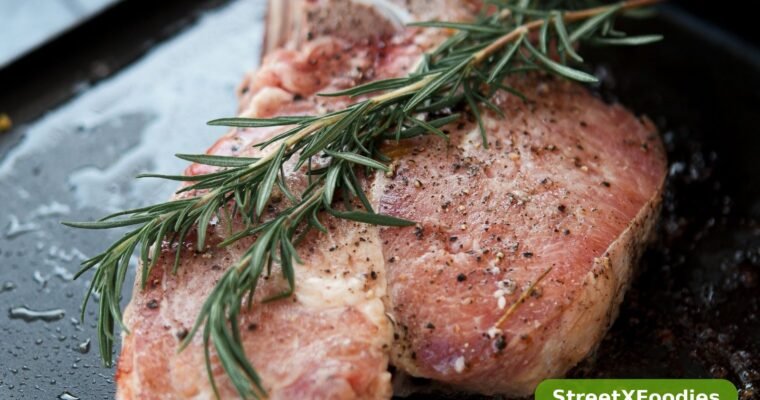
One-Pan Honey Garlic Pork Chops with Apples
Juicy one-pan honey garlic pork chops with sweet apples and fresh sage. An easy, cosy skillet dinner ready in 35 minutes – perfect for autumn evenings.

Juicy one-pan honey garlic pork chops with sweet apples and fresh sage. An easy, cosy skillet dinner ready in 35 minutes – perfect for autumn evenings.
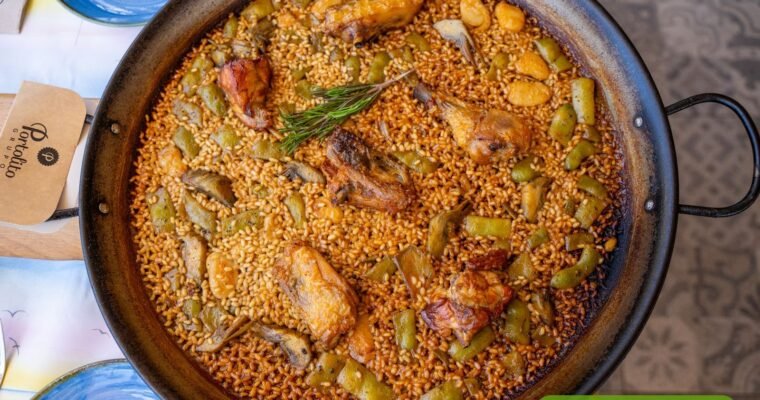
Smoky one-pan chicken and chorizo rice with sweet peppers, paprika and peas. An easy, flavour-packed family dinner made in one pan in about 45 minutes.
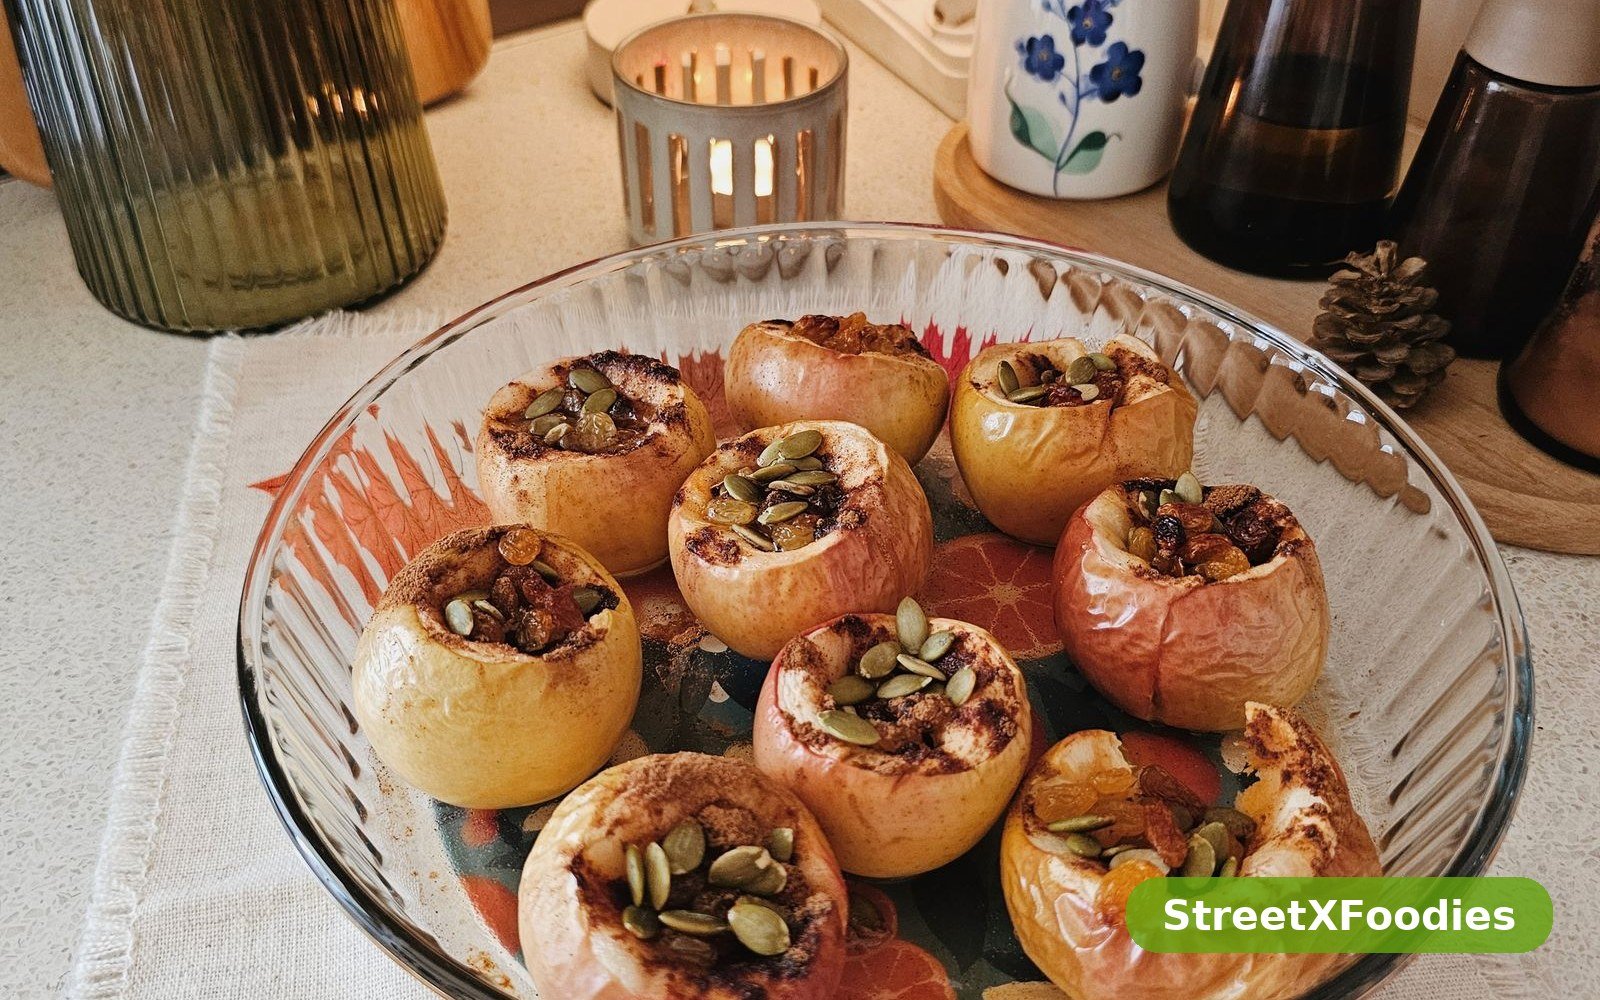
There is a particular smell that tells me autumn has properly arrived, and it is the smell of apples baking with cinnamon. It fills the whole house, warm and sweet and a little bit spicy, and it makes an ordinary evening feel cosy in a way that very few other dishes can. I started making these baked apples in the oven years ago, usually on a Sunday, when I had time to wait for them to soften slowly. Then I tried them in the air fryer on a whim, and I have barely gone back to the oven since, because they cook in half the time and the tops turn beautifully golden and crisp.
The idea is simple. You hollow out a few good baking apples, fill them with a mixture of oats, brown sugar, cinnamon, butter, and a handful of raisins or chopped nuts, and let the air fryer do the rest. The apples soften until they are tender enough to cut with a spoon, the filling turns into something like a warm crumble, and the juices from the apples mix with the melted butter and sugar to make a light syrup in the bottom of the basket. It is a dessert, yes, but it is also the kind of dessert you can make on a Tuesday night without thinking twice about it.
I love this recipe because it uses ingredients I almost always have. Apples, oats, cinnamon, butter, and a little sugar are not things I need to plan a shopping trip around. If I have a few apples that are starting to go soft in the fruit bowl, this is what I make with them, and it feels like a small act of rescue, turning fruit that might have been wasted into something everyone wants to eat. It is also a lovely recipe to make with children, because hollowing out the apples and spooning in the filling is easy, hands-on work, and they love choosing their own toppings at the end.
What makes the air fryer version special is the texture. In the oven, baked apples can sometimes turn soft all over, including the filling, and you lose that lovely contrast. In the air fryer, the hot air crisps the oat topping while the apple underneath steams gently in its own juice, so you get a crunchy top, a soft apple, and a warm, buttery filling all in the same bite. Serve them straight from the basket with ice cream, custard, or just a spoonful of yoghurt, and you have a pudding that tastes like you spent far longer on it than you did.
First, it is quick. A baked apple in the oven can take forty-five minutes or more, which is fine on a slow Sunday but not much use on a busy evening. In the air fryer, these apples are ready in about twenty minutes, and the preparation takes less than ten. That means you can decide you want a warm pudding after dinner and actually have it on the table before anyone has lost interest, which is not something I can say about many desserts.
Second, it is wonderfully simple. There is no pastry to make, no custard to stir, and no special equipment beyond a spoon and a small knife. You core the apples, mix the filling in a bowl, spoon it in, and cook. If you can make porridge, you can make these baked apples. It is the kind of recipe that gives new cooks confidence, because it is almost impossible to get badly wrong, and even if your apples are a little more or less soft than planned, they will still taste delicious.
Third, it is flexible in a way that suits real life. You can make one apple for yourself, or four for the family, or a whole batch for friends, and the method stays the same. You can change the filling to suit what you have, swap the raisins for chopped dates, use walnuts instead of pecans, add a little ginger or nutmeg, or leave the nuts out altogether. You can serve them with ice cream for a proper pudding, with yoghurt for breakfast, or on their own with a cup of tea. One recipe, many uses, and no fuss.
It also feels wholesome in a way that a lot of desserts do not. The main ingredient is a whole apple, the filling is mostly oats, and the sugar is there to sweeten rather than to dominate. I am not going to pretend it is health food, because there is butter and brown sugar in it, but it is a dessert made from real, simple ingredients, and it leaves you feeling satisfied rather than heavy. That matters to me, especially when I am cooking for my family and I want a treat that is also a sensible choice.
Start by choosing your apples, because the variety you use makes a real difference. You want apples that are firm enough to hold their shape when they cook, but not so tart that they need a lot of sugar to be enjoyable. Braeburn and Honeycrisp are my favourites, because they soften nicely without collapsing, and they have a natural sweetness that works well with cinnamon. Granny Smith apples are also good if you like a sharper, more tangy pudding, although you may want an extra teaspoon of brown sugar with those. Avoid very soft eating apples, because they tend to slump into a puddle in the air fryer, and while they still taste fine, they do not look as lovely on the plate.
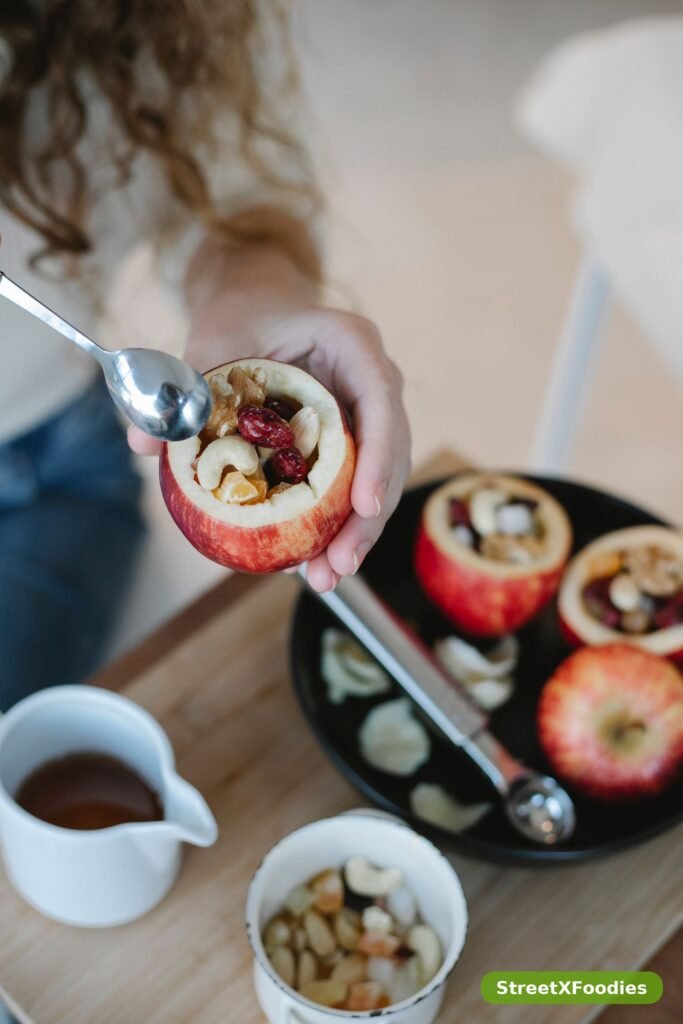
Wash the apples and dry them well, then cut a small slice off the top of each one, about a centimetre down, and set those little lids aside. You can put them back on top for serving if you like, which looks charming. Now core the apples carefully. I use a small knife or an apple corer, and I work slowly, cutting around the core and scooping it out without going all the way through the bottom. You want to leave about a centimetre of apple at the base, so the filling stays inside and the juices do not leak out. Use a teaspoon to widen the hollow a little and scrape out any remaining seeds or tough bits. Brush the cut surfaces lightly with lemon juice as you go, because it stops the apples from browning while you prepare the filling.
Next, make the oat filling, which takes about two minutes. Put the rolled oats, brown sugar, softened butter, raisins, chopped nuts if you are using them, cinnamon, nutmeg, vanilla, and a pinch of salt in a small bowl. Use your fingers or a fork to rub the butter into the oats until the mixture looks like damp, crumbly breadcrumbs and holds together loosely when you squeeze it. It should smell warm and spicy already, and you should be able to see the cinnamon dusted through the oats. If the mixture looks too dry, add another small knob of butter. If it looks too wet, add another spoonful of oats. You are aiming for a filling that is moist enough to stick together but still crumbly, like the topping on a good apple crumble.
Spoon the filling into the hollowed apples, pressing it down gently with the back of a teaspoon and mounding it up a little above the top. Do not pack it too tightly, because the oats need a bit of space to crisp up, but do press it in firmly enough that it will not fall out when you move the apples. If you have a little filling left over, sprinkle it around the base of the apples in the basket, where it will toast and turn into crunchy little clusters that are wonderful spooned over the finished apples. Put a teaspoon of water or apple juice into the bottom of each apple before you add the filling if your apples are very firm, because the extra moisture helps them steam and soften evenly.
Lightly grease the air fryer basket or line it with a small piece of parchment paper, and place the apples in a single layer with a little space between them. They need room for the hot air to move around them, so do not squeeze them in too tightly. If you are making more than four, cook them in batches. Set the air fryer to 175°C, or 350°F, and cook for eighteen to twenty-two minutes. The exact time depends on the size and variety of your apples, so start checking at eighteen minutes. The apples are ready when a knife slides easily into the flesh, the skin has wrinkled slightly, and the oat topping is golden brown and crisp at the edges.
Let the apples rest for three or four minutes before you serve them, because they are very hot inside and the filling needs a moment to settle. That short rest also lets the juices thicken slightly, so they coat the apple rather than running everywhere. Serve each apple in a small bowl, with a scoop of vanilla ice cream, a spoonful of custard, or a dollop of Greek yoghurt, and a sprinkle of extra cinnamon on top. If you saved the little apple lids, pop one on top of each apple at a jaunty angle, because it looks lovely and it tells everyone exactly what they are about to eat.
Choose the right apples, and half the work is done. Firm, sweet-tart varieties like Braeburn, Honeycrisp, Gala, and Fuji hold their shape well and taste wonderful with cinnamon. Granny Smith apples work too, but they are sharper, so add a little more sugar. Avoid Red Delicious and other very soft apples, because they collapse in the heat and turn to mush before the filling has had time to crisp. If you are not sure, ask at the market, or buy one extra apple and test it first.
Do not core all the way through the bottom of the apple. This is the mistake I made the first time, and the filling leaked out into the basket while the apple cooked. Leave a good centimetre of flesh at the base, and check from underneath that you cannot see daylight through the hole. If you do accidentally go through, you can plug the hole with a small piece of apple or a raisin, and it will usually hold. It is a small detail, but it makes the difference between a neat baked apple and a messy one.
Keep the temperature moderate. It is tempting to cook the apples at a very high heat to speed things up, but the filling will burn before the apple has softened. A temperature of 175°C is the sweet spot, hot enough to crisp the oats and soften the apple, but gentle enough to give the inside time to cook through. If your topping is browning too fast, you can cover the apples loosely with a small piece of foil for the last five minutes, which protects the topping while the apple finishes cooking.
Check for doneness with a knife, not just by looking. The skin will wrinkle and the topping will turn golden, but the real test is whether a thin knife slides into the apple flesh with very little resistance. If it meets a firm, crunchy centre, give the apples another three or four minutes. If it slides in easily, they are ready. Every apple is a little different, so trust the knife more than the clock, and remember that the apples will continue to soften slightly as they rest.
If you like a richer filling, stir a tablespoon of chopped dark chocolate or a few chocolate chips into the oat mixture. The chocolate melts as the apples cook, and you get warm, melty pockets of chocolate in the middle of the cinnamon oats, which is wonderful with vanilla ice cream. You can also add a spoonful of peanut butter to the filling for a nutty, caramel-like flavour, although you will want to reduce the butter slightly if you do, or the filling can become too soft.
For a festive version, add a pinch of ground ginger, a pinch of mixed spice, and a tablespoon of chopped dried cranberries to the filling. The cranberries turn jewel-red as they cook, and the spices make the whole kitchen smell like Christmas. Serve these with a spoonful of brandy butter or a drizzle of warm caramel sauce, and they are good enough for a holiday dinner. I make this version every December, and it has become a small tradition in our house.
If you want a lighter, breakfast-friendly version, leave out the brown sugar or reduce it to a single teaspoon, and serve the apples with Greek yoghurt and a drizzle of honey instead of ice cream. The oats and the apple make it filling enough for breakfast, and the cinnamon makes it feel like a treat even though it is mostly fruit and oats. You can also add a spoonful of chia seeds or ground flaxseed to the filling for extra fibre, although the texture will be slightly denser.
You can also change the fruit. Pears work beautifully in this recipe, although they cook a little faster, so check them after fifteen minutes. Use firm pears like Bosc or Conference, core them in the same way, and fill them with the same oat mixture. The result is softer and more delicate than the apple version, and it is lovely with a spoonful of mascarpone. If you want more dessert ideas, these easy lemon bars with a shortbread crust are another favourite of mine, bright and tangy where the baked apples are warm and spiced.
For a nut-free version, simply leave the nuts out and add an extra tablespoon of oats and a few more raisins. The filling will still be crunchy and satisfying, and it will be safe for school lunch boxes and for friends with nut allergies. You can also use sunflower seeds or pumpkin seeds instead of nuts, which give you crunch without the allergen, and they toast beautifully in the air fryer.
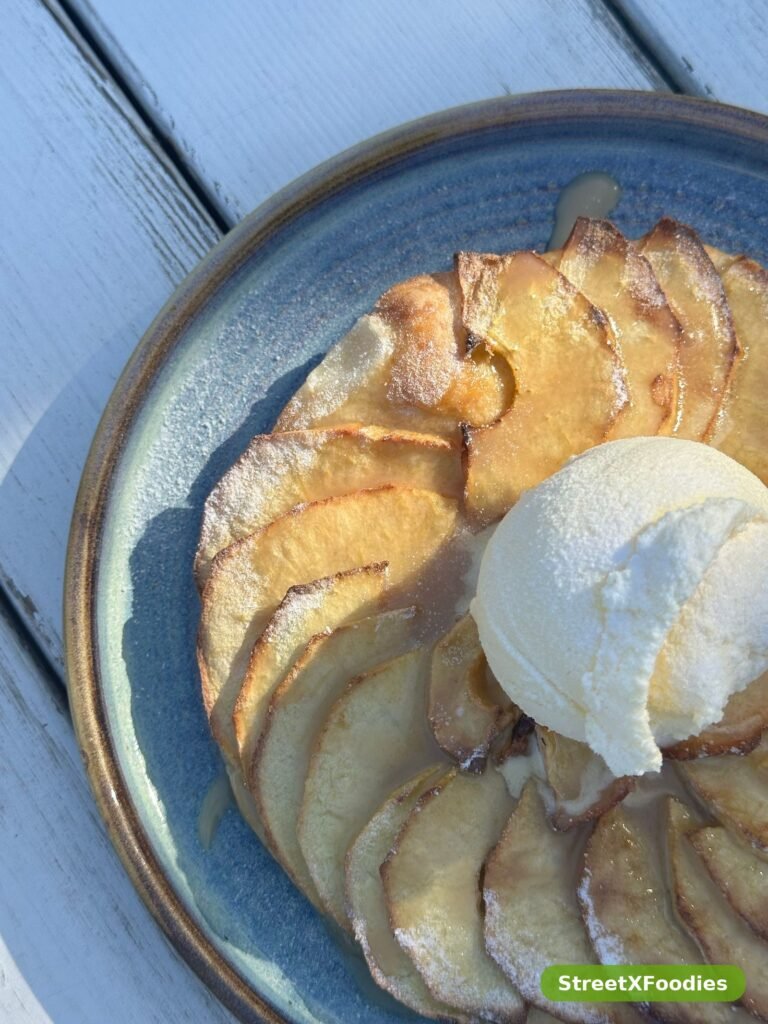
The classic way to serve these apples is warm, in a bowl, with a scoop of vanilla ice cream melting slowly over the top. The contrast between the hot apple and the cold ice cream is one of the great simple pleasures, and the ice cream turns into a light sauce as it melts, mixing with the cinnamon juices in the bowl. Add a sprinkle of extra cinnamon and a few toasted oats on top, and you have a pudding that looks and tastes like it came from a good cafe.
Custard is another wonderful partner. A spoonful of warm custard poured over a baked apple is comforting in the way that only custard can be, and it turns the dish into something that feels like a proper Sunday pudding. If you want something lighter, a dollop of Greek yoghurt or a spoonful of crème fraîche works just as well, and the tang of the yoghurt balances the sweetness of the apple and the sugar. A drizzle of honey or maple syrup over the top adds a final touch of sweetness without making the dish heavy.
For breakfast, serve a baked apple with yoghurt and a handful of fresh berries, or slice it and spoon it over porridge. The warm, spiced apple turns an ordinary bowl of porridge into something special, and the oat filling means you are already halfway to a crumble topping. I have also chopped a leftover baked apple and stirred it into pancake batter, which makes the pancakes taste like apple pie, and children love them. If you are in the mood for more baking, these homemade cinnamon rolls with cream cheese frosting use the same warm cinnamon flavours in a completely different way.
They also work well as part of a bigger dessert table. Put a tray of baked apples out with a bowl of ice cream, a jug of custard, and a small dish of toasted nuts, and let people serve themselves. It is a relaxed, generous way to end a meal, and it suits a casual dinner party much better than a fussy, plated dessert. If you are serving them after a savoury meal, a cup of tea or coffee alongside is all you need. For more easy ideas that work any day of the week, have a look at these easy street food recipes at home, and if you want something savoury to balance the sweetness, this easy street-style corn is a lovely, buttery contrast.
Leftover baked apples will keep in the fridge for up to three days in an airtight container. Let them cool completely before you put the lid on, because trapping steam will make the oat topping soft. When you want to eat them again, the air fryer is the best way to reheat them. Pop them back in at 160°C, or 320°F, for four to five minutes, and the topping will crisp up again while the apple warms through. The microwave will work in a pinch, but it makes the topping soft, so use it only if you are in a hurry, and heat the apples in short bursts of thirty seconds.
You can also prepare the apples ahead of time. Core and fill them in the morning, cover them tightly with cling film, and keep them in the fridge until you are ready to cook. Brush the cut surfaces with a little extra lemon juice to stop them from browning, and take them out of the fridge fifteen minutes before cooking so they are not ice cold when they go into the basket. Add an extra two minutes to the cooking time if they are still cold in the middle. The dry oat filling, without the butter mixed in, will keep in a sealed jar for a week, so you can mix a big batch and use it whenever you have apples to fill.
I do not recommend freezing cooked baked apples, because the texture changes too much. The apple goes soft and watery when it thaws, and the oat topping loses its crunch. If you really need to freeze them, freeze them uncooked, filled but not cooked, on a tray until solid, then transfer them to a freezer bag for up to a month. Cook them straight from frozen in the air fryer at 170°C for twenty-five to thirty minutes, and check with a knife that the apple is tender all the way through before serving.
Firm, sweet-tart apples like Braeburn, Honeycrisp, Gala, and Fuji work best, because they hold their shape and soften evenly. Granny Smith apples are also good if you like a sharper flavour, although you may want a little more sugar. Avoid very soft apples like Red Delicious, because they collapse before the filling has crisped. Choose apples that are similar in size so they cook at the same rate.
No, you do not need to peel them. The skin helps the apple hold its shape while it cooks, and it adds a little texture and colour to the finished dish. The skin also contains fibre and nutrients, so leaving it on is a sensible choice. If you or someone at your table really dislikes apple skin, you can peel the apples, but handle them gently, because they will be more fragile without the skin to support them.
Yes, absolutely. Simply leave the nuts out and add an extra tablespoon of oats and a few more raisins or chopped dates. The filling will still be crunchy and satisfying, and it will be safe for people with nut allergies. Sunflower seeds or pumpkin seeds are a good substitute if you want crunch without nuts, and they toast nicely in the air fryer. For more guidance on baking with apples, this King Arthur Baking baked apples recipe is a helpful reference with clear, tested advice.
Leave a good centimetre of apple at the base when you core the apples, and do not pack the filling in too tightly. Press it down gently, mound it up just a little, and place the apples in the basket carefully so they do not tip over. If a little filling does fall out, do not worry. It will toast in the basket and you can spoon it back over the apples when you serve them. It still tastes wonderful, even if it looks a little rustic.
Yes, you can. Use a plant-based butter or coconut oil instead of dairy butter, and serve the apples with a dairy-free ice cream or coconut yoghurt. The rest of the ingredients, apples, oats, sugar, cinnamon, and raisins, are already plant-based. Coconut oil gives the filling a faint coconut flavour, which works nicely with the cinnamon, so it is a good choice if you like that taste. Maple syrup can replace the brown sugar if you prefer.
Yes, you can bake them in a normal oven at 190°C, or 375°F, for thirty-five to forty-five minutes, until a knife slides easily into the apple and the topping is golden. Place them in a small baking dish with a splash of water or apple juice in the bottom, and cover them loosely with foil for the first twenty minutes if the topping is browning too fast. The air fryer is quicker and gives a crisper topping, but the oven version is just as delicious. For more baked apple ideas, the BBC Good Food baked apples recipe is worth a look.
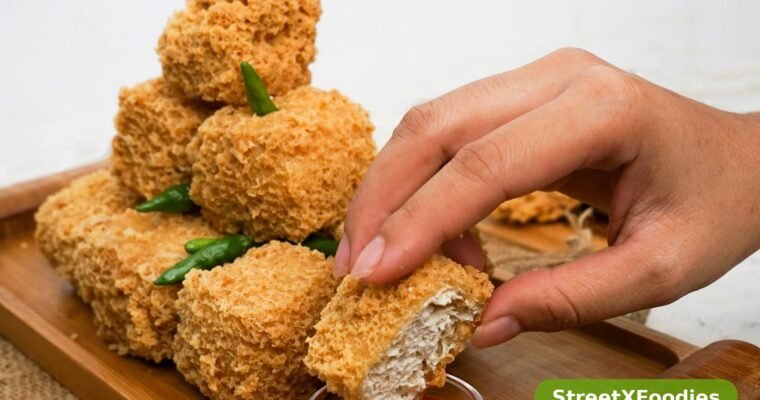
Crispy air fryer tofu bites with a creamy peanut sauce. Golden, crunchy and full of flavour – an easy vegan snack or dinner ready in 30 minutes at home.

Crispy air fryer stuffed mushrooms filled with creamy cheese, garlic and fresh herbs. An easy, crowd-pleasing party appetizer ready in under 30 minutes.
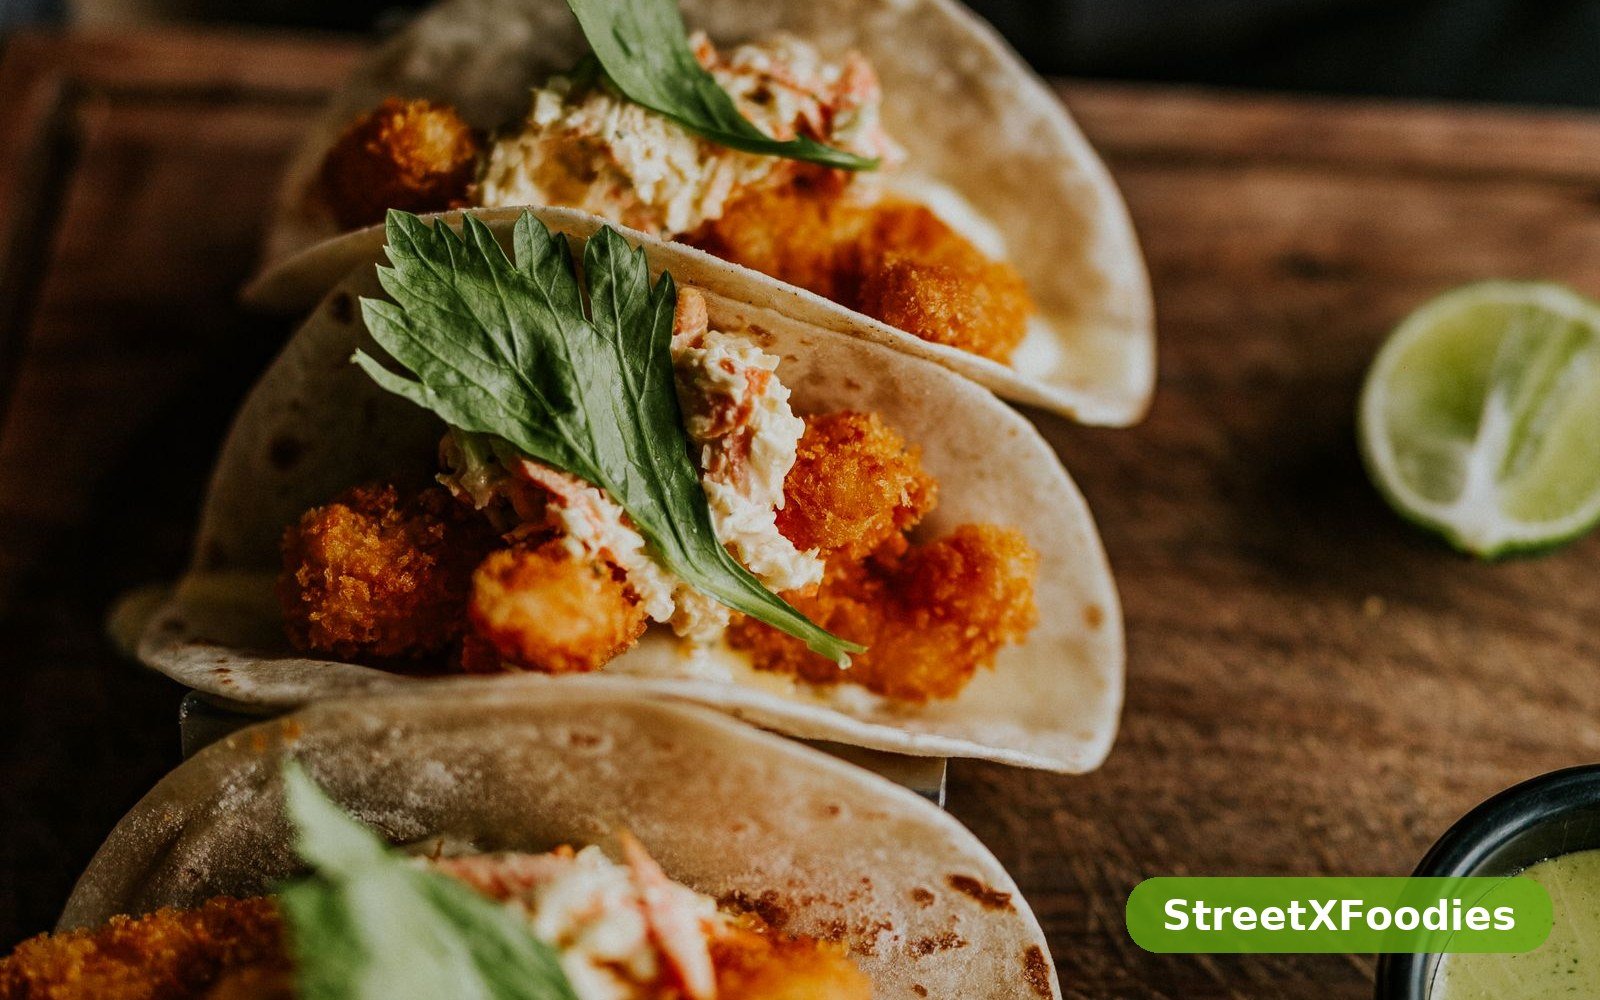
There’s a particular kind of happiness that comes from biting into a really good fish taco. The crunch of the coating, the flaky fish inside, the cool tangy slaw, a little creamy sauce, and that squeeze of lime that ties it all together — it’s a small, perfect package, and it’s the kind of food that makes a weeknight feel like a holiday. These air fryer crispy fish tacos with lime slaw are my go-to version, because they give you all of that crunch and flavour without a pot of hot oil on the stove and without the kitchen smelling like a chip shop for hours afterwards.
I started making fish tacos in the air fryer after one too many attempts at deep-frying fish at home ended with oil everywhere and a coating that fell off before it even hit the plate. The air fryer changed everything. The hot circulating air crisps the coating evenly, the fish stays moist inside, and there’s almost no mess to clean up. It takes about fifteen minutes, and the result is genuinely as good as the deep-fried version — lighter, in fact, and you can actually taste the fish instead of just the oil.
The lime slaw is what makes these tacos special. It’s not the heavy, mayonnaise-drenched slaw you get at some places — it’s light and crunchy, with shredded cabbage, carrot, and red onion, dressed in lime juice and a little honey. It stays crisp, it cuts through the richness of the fried fish, and it adds a bright, fresh note that makes the whole taco feel balanced. Make it while the fish cooks and you’ve got dinner on the table in about half an hour.
This is also a wonderfully flexible recipe. Use whatever firm white fish you can get — cod, haddock, tilapia, or pollock all work beautifully. Make the slaw as spicy or as mild as you like. Add avocado, pickled onions, or a splash of hot sauce. It’s the kind of meal that suits a crowd, because everyone can build their own tacos exactly the way they like them. And if you’re in the mood for more tacos, my crispy chicken tacos without deep frying use the same air fryer trick with a completely different filling.
The air fryer is the real hero here. It gives you a golden, crunchy coating with just a light spray of oil — no deep frying, no oil splatter, no greasy kitchen. The fish comes out crisp on the outside and flaky and moist on the inside, every single time. And because the air fryer heats up in minutes, the whole meal is on the table in about thirty minutes from start to finish. It’s weeknight cooking at its best.
The lime slaw is another reason to love this recipe. It’s fresh, crunchy, and tangy, and it does the job that a heavy sauce can’t — it brightens everything up and keeps the tacos from feeling rich or heavy. The lime juice softens the cabbage just enough while keeping it crisp, and a little honey balances the acidity. It’s the kind of slaw you’ll want to make again for other meals too, because it goes with almost anything grilled or fried.
It’s also a fun, hands-on meal. Tacos are meant to be built at the table, with everyone choosing their own fillings and toppings. That makes them perfect for families with picky eaters — the kids can skip the slaw, someone else can add extra hot sauce, and everyone ends up happy. Put all the components out in bowls and let people help themselves. It’s relaxed, it’s interactive, and it’s the kind of dinner where people linger at the table.
And it’s lighter than you’d expect. Crispy fish sounds indulgent, but the air fryer version uses very little oil, the slaw is mostly vegetables, and the whole taco is packed with protein and fresh ingredients. You can eat two or three and still feel good about it. It’s the kind of meal that proves healthy food doesn’t have to be boring — it just has to be well made.
For the lime slaw:
For the creamy sauce:
Start with the lime slaw, because it tastes better if it has a few minutes to sit. In a large bowl, whisk together the lime juice and zest, the honey, the olive oil, and a good pinch of salt and pepper. Taste the dressing — it should be bright and tangy with just a hint of sweetness. If it makes your mouth water, it’s right. Now add the green cabbage, red cabbage, grated carrot, and sliced red onion, and toss everything together until the vegetables are evenly coated. Stir in the chopped coriander, cover the bowl, and put it in the fridge. Ten minutes is enough for the flavours to come together, but it will keep happily for an hour if you make it ahead. The cabbage will soften very slightly while staying crisp, which is exactly what you want.
Now make the creamy sauce. In a small bowl, stir together the sour cream, mayonnaise, lime juice, hot sauce, grated garlic, and a pinch of salt. Whisk it until it’s smooth and pourable — if it’s too thick, add a teaspoon of water or a little more lime juice. Taste and adjust: more hot sauce if you like heat, more lime if you want it brighter. Set it aside. This sauce is wonderful on tacos, but it’s also great as a dip for the fish on its own, or drizzled over grilled chicken or roasted vegetables.
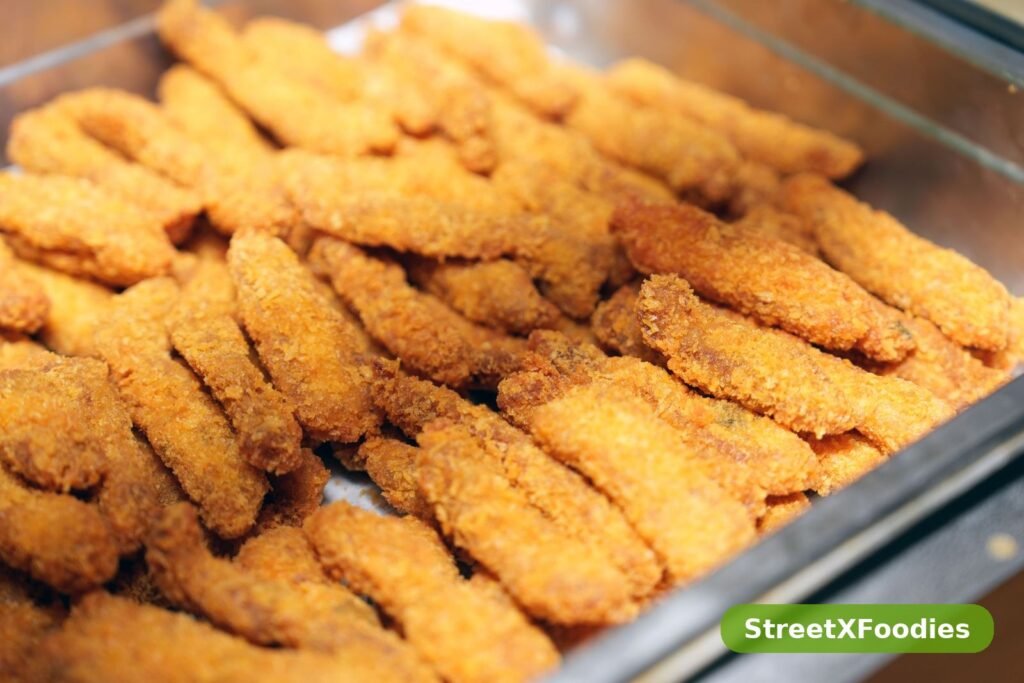
Next, set up your coating station for the fish. You’ll need three shallow dishes. In the first, mix the flour with the smoked paprika, garlic powder, cumin, onion powder, salt, pepper, and cayenne if you’re using it. In the second, put the beaten eggs. In the third, mix the panko breadcrumbs and cornmeal together. Pat the fish strips dry with kitchen paper — this is important, because a dry surface helps the coating stick and crisp up. Season the fish lightly with a pinch of salt, then work one strip at a time: dredge it in the seasoned flour and shake off the excess, dip it in the egg, then press it into the breadcrumb mixture, turning it so every side is coated. Set each coated strip on a plate as you go.
Preheat your air fryer to 200°C (400°F) for about three minutes. Lightly spray the basket with cooking oil spray — this stops the coating from sticking and helps it crisp. Arrange the fish strips in the basket in a single layer, leaving a little space between each one. Don’t pile them on top of each other or they’ll steam instead of crisping. Spray the tops of the fish lightly with oil spray, and cook for 10 to 12 minutes, turning the strips carefully halfway through, until they’re deep golden brown and the fish flakes easily with a fork. The exact time depends on how thick your fish is — thinner strips may be done in 9 minutes, thicker ones might need 13. If you’re cooking a big batch, work in two rounds and keep the first batch warm in a low oven.
While the fish cooks, warm the tortillas. You can do this in a dry pan over medium heat for about 30 seconds per side, or wrap them in a clean tea towel and microwave them for 20 seconds. Warm tortillas are soft and flexible; cold ones crack when you fold them, and nobody wants a taco that falls apart in their hands. Keep them wrapped in the tea towel until you’re ready to serve so they stay warm and pliable.
Now build your tacos. Lay a warm tortilla flat, add a spoonful of lime slaw, then two or three pieces of crispy fish, then a drizzle of the creamy sauce. Add any extras you like — sliced avocado, pickled red onion, a few coriander leaves, or a squeeze of fresh lime. Fold it up, take a bite, and enjoy it while the fish is still hot and crunchy. That’s the whole meal, and it comes together in about thirty minutes.
Pat the fish dry before coating it. This is the single most important step for a coating that actually stays on. Wet fish makes the flour turn to paste, the egg slides off, and the crumbs fall away in the air fryer. Take a minute with kitchen paper, get each strip properly dry, and the coating will cling beautifully and crisp up into a golden shell. It’s a small thing, but it makes all the difference.
Don’t crowd the air fryer basket. This is the golden rule of air frying, and it applies to everything. The hot air needs to circulate around each piece of fish to crisp it evenly. If the strips are touching or piled on top of each other, the coating stays soft and pale where they overlap. Cook in batches if you need to — it only takes a few extra minutes, and the result is so much better. Keep the finished batch warm in a low oven while the next one cooks.
Use panko and cornmeal together. Panko on its own gives a light, crispy coating, but adding cornmeal gives it extra crunch and a beautiful golden colour that looks like proper fish and chips. The cornmeal also adds a subtle sweetness that works wonderfully with the lime slaw. If you can’t find cornmeal, use panko on its own — it’ll still be delicious. And if you want more crispy chicken ideas, my spicy peri peri chicken legs show how the same bold coating approach works with a completely different flavour.
Spray, don’t pour, the oil. A light, even spray of oil over the coated fish is all you need for a golden, crispy result. Too much oil and the coating goes greasy; too little and it can look pale and dry. Hold the spray bottle about 15 cm away and give each strip a quick, even coat. A refillable oil sprayer is a great investment if you use your air fryer often — it gives you much better control than a can, and you can use any oil you like.
Make the slaw just before you eat. The slaw is at its best when it’s fresh and crunchy — about ten to thirty minutes after you toss it. If it sits for hours, the cabbage softens and the dressing pools at the bottom of the bowl. If you do need to make it ahead, keep the vegetables and the dressing separate and toss them together just before serving. That way the cabbage stays crisp and the dressing stays bright.
If you don’t eat fish, this recipe works beautifully with other proteins. Try it with chicken strips — coat them the same way and cook them in the air fryer for about 12 to 14 minutes. Prawns are another great option; they cook in just 6 to 8 minutes and the coating goes wonderfully crisp. And for a vegetarian version, thick slices of halloumi or cauliflower florets coated the same way are absolutely delicious. The lime slaw and creamy sauce work with all of them.
You can change the seasoning in the coating to suit your mood. Add a teaspoon of Cajun seasoning for a Southern-style fish taco, or a pinch of chilli flakes and some lime zest for a brighter, spicier version. A little Old Bay seasoning is wonderful if you can find it. Or go in a completely different direction with a Japanese-inspired coating — panko, a little soy sauce in the egg, and a drizzle of sriracha mayo on top. The basic method stays the same, and the flavour possibilities are endless.
For the slaw, you can swap the cabbage for a crunchy jicama or radish slaw, or add thinly sliced mango for a sweet, tropical note. Pickled red onions are a fantastic addition — they add colour, tang, and a little sweetness that works beautifully with the fish. If you want a creamier slaw, stir a spoonful of the creamy sauce into the cabbage before serving. And if you like cooling salads alongside spicy food, my creamy cucumber salad with dill is a lovely, refreshing side.
You can also change the tortillas. Corn tortillas are more traditional and have a lovely flavour, but they can be a little fragile — warm them well and don’t overfill them. Flour tortillas are softer and more forgiving, especially for kids. For a lighter version, use large lettuce leaves as wraps instead of tortillas. They’re fresh, crunchy, and they let the fish and slaw shine without any bread at all.
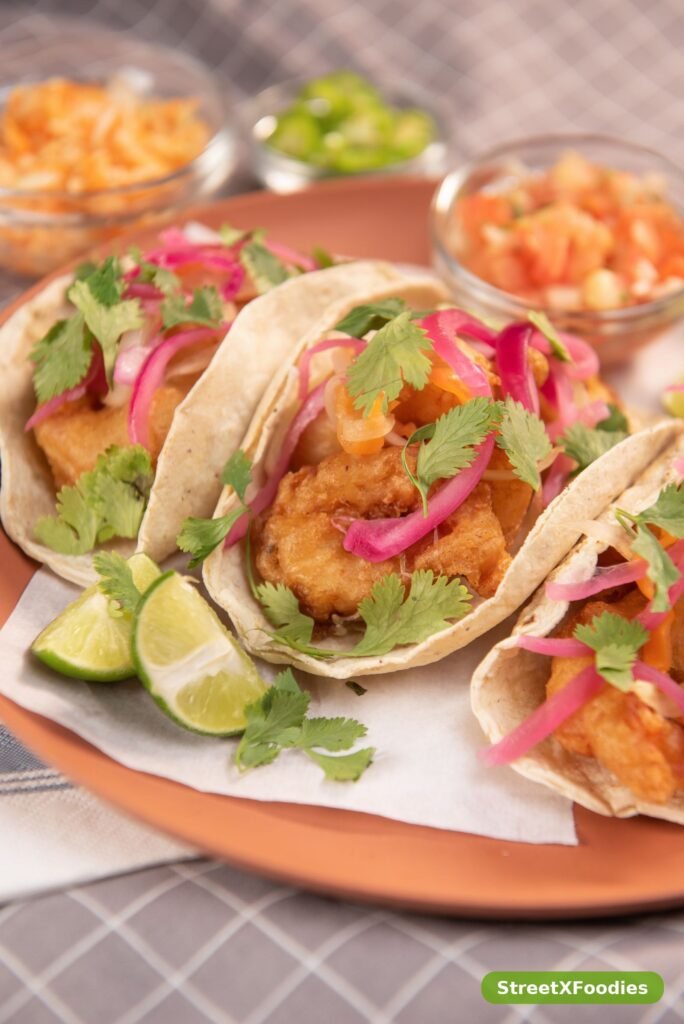
The tacos themselves are the main event, so keep the sides simple. A bowl of sweet potato fries is a wonderful partner — the sweet, salty crunch alongside the tangy tacos is a great combination, and you can cook them in the air fryer while the fish rests. A simple pot of Mexican rice, or just some plain rice with lime and coriander stirred through, is another easy option that soaks up any extra sauce.
For a bigger spread, add a bowl of guacamole, some pickled jalapeños, and a jug of cold lemonade or iced tea. This is the kind of meal that suits a warm evening and a table full of people, with everything laid out in the middle and everyone building their own tacos. Add a big salad on the side — something simple with lettuce, tomato, and cucumber — and you’ve got a complete dinner that feels like a celebration.
If you’re serving these as part of a taco night, make a second filling alongside. My easy homemade beef street tacos are a great companion, and having two options makes the table feel generous. Put the fish, the beef, the slaw, the sauces, and the tortillas all out together, and let everyone mix and match. It’s the kind of meal that gets people talking and reaching for seconds.
Leftover fish is best eaten the same day, but it will keep in the fridge for one to two days in an airtight container. The coating will soften in the fridge, which is unavoidable, but you can crisp it back up in the air fryer at 190°C (375°F) for three or four minutes. Store the slaw and the sauce separately — the slaw will keep for two days, and the sauce for three to four days in a sealed container in the fridge.
Don’t store assembled tacos. The tortilla will go soggy, the slaw will wilt, and the fish will lose its crunch. Keep all the components separate and build fresh tacos when you want them. It’s a little more work, but the result is so much better — a freshly built taco with crisp fish and crunchy slaw is a completely different experience from a soggy leftover one.
Leftover fish is great in other dishes. Flake it into a salad, pile it onto a sandwich with the creamy sauce, or stir it through pasta with a little lemon and olive oil. The slaw is wonderful on its own as a side salad, or piled into sandwiches and wraps. And the creamy sauce keeps for days and works as a dip for vegetables, chicken, or chips. Nothing needs to go to waste.
Any firm white fish works well. Cod is the classic choice — mild, flaky, and widely available. Haddock is similar and slightly sweeter. Tilapia is budget-friendly and cooks quickly. Pollock is a good sustainable option. What matters most is that the fish is firm enough to hold together when you cut it into strips and coat it. Avoid very delicate fish like sole or flake, which can fall apart, and avoid oily fish like salmon or mackerel — they’re delicious, but they don’t suit this crispy coating and lime slaw combination. Serious Eats has a great fish tacos recipe with more detail on choosing and preparing the fish.
Yes, absolutely. You can bake the coated fish in the oven at 220°C (425°F) for about 12 to 15 minutes, turning halfway, on a wire rack set over a baking tray so the hot air circulates underneath. The coating won’t be quite as crisp as the air fryer version, but it’s still very good. You can also shallow-fry the fish in a pan with a little oil, about three minutes per side, though that’s messier and uses more oil. The air fryer is the easiest option, but the recipe is flexible.
The key is dry fish and a proper three-step coating. Pat the fish completely dry, then flour, then egg, then crumbs, pressing the crumbs on gently but firmly. Let the coated fish sit for a few minutes before cooking so the coating sets. Don’t move the fish around in the air fryer basket once it’s in — let it cook undisturbed for the first few minutes so the coating firms up. And use a light spray of oil rather than brushing it on, because brushing can dislodge the crumbs.
You can, but it’s best fresh. If you need to prep ahead, keep the shredded vegetables and the dressing in separate containers in the fridge, and toss them together about ten to fifteen minutes before serving. That way the cabbage stays crisp and the dressing stays bright. If you toss it too early, the cabbage wilts and the dressing pools at the bottom. The sauce can be made up to two days ahead and kept in a sealed container in the fridge — just give it a stir before using.
Both work, and it’s really a matter of preference. Corn tortillas are more traditional for fish tacos and have a lovely, slightly nutty flavour, but they’re more fragile and can crack if they’re not warmed properly. Flour tortillas are softer, more flexible, and easier to fold, especially for kids. I like flour for a weeknight and corn for a weekend when I have time to warm them carefully in a dry pan. Either way, warm them before serving — cold tortillas are the number one cause of taco disasters.
Yes, with a few swaps. Use gluten-free flour for the dredge and gluten-free panko or crushed gluten-free crackers for the coating. Cornmeal is naturally gluten-free, so you can use more of that in the crumb mixture. Make sure your tortillas are corn tortillas, which are naturally gluten-free — just check the label to confirm they were made in a gluten-free facility if you need to be strict about it. The slaw and the sauce are naturally gluten-free as written. The result is just as crispy and delicious.
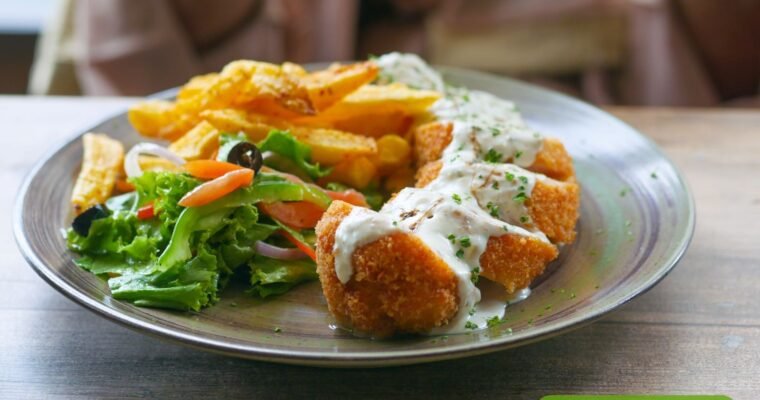
Baked chicken cordon bleu with Dijon sauce — golden crumbed chicken stuffed with ham and melted cheese. A classic dinner, baked not fried, ready in an hour.
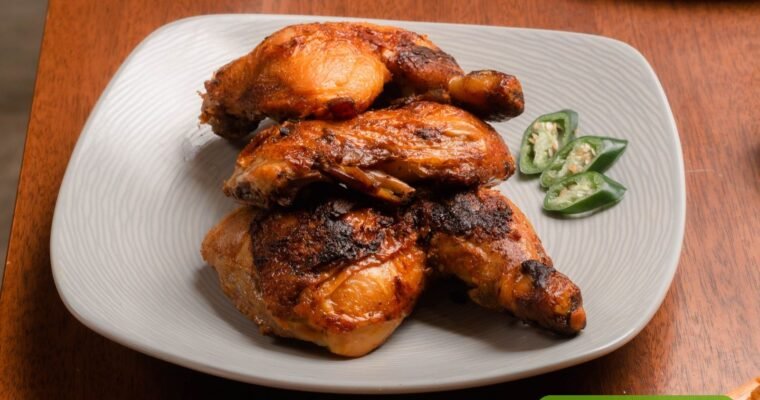
Spicy peri peri chicken legs — fiery, tangy, and juicy with a homemade peri peri sauce. Marinate, roast, and enjoy crispy skin with real chilli heat at home.
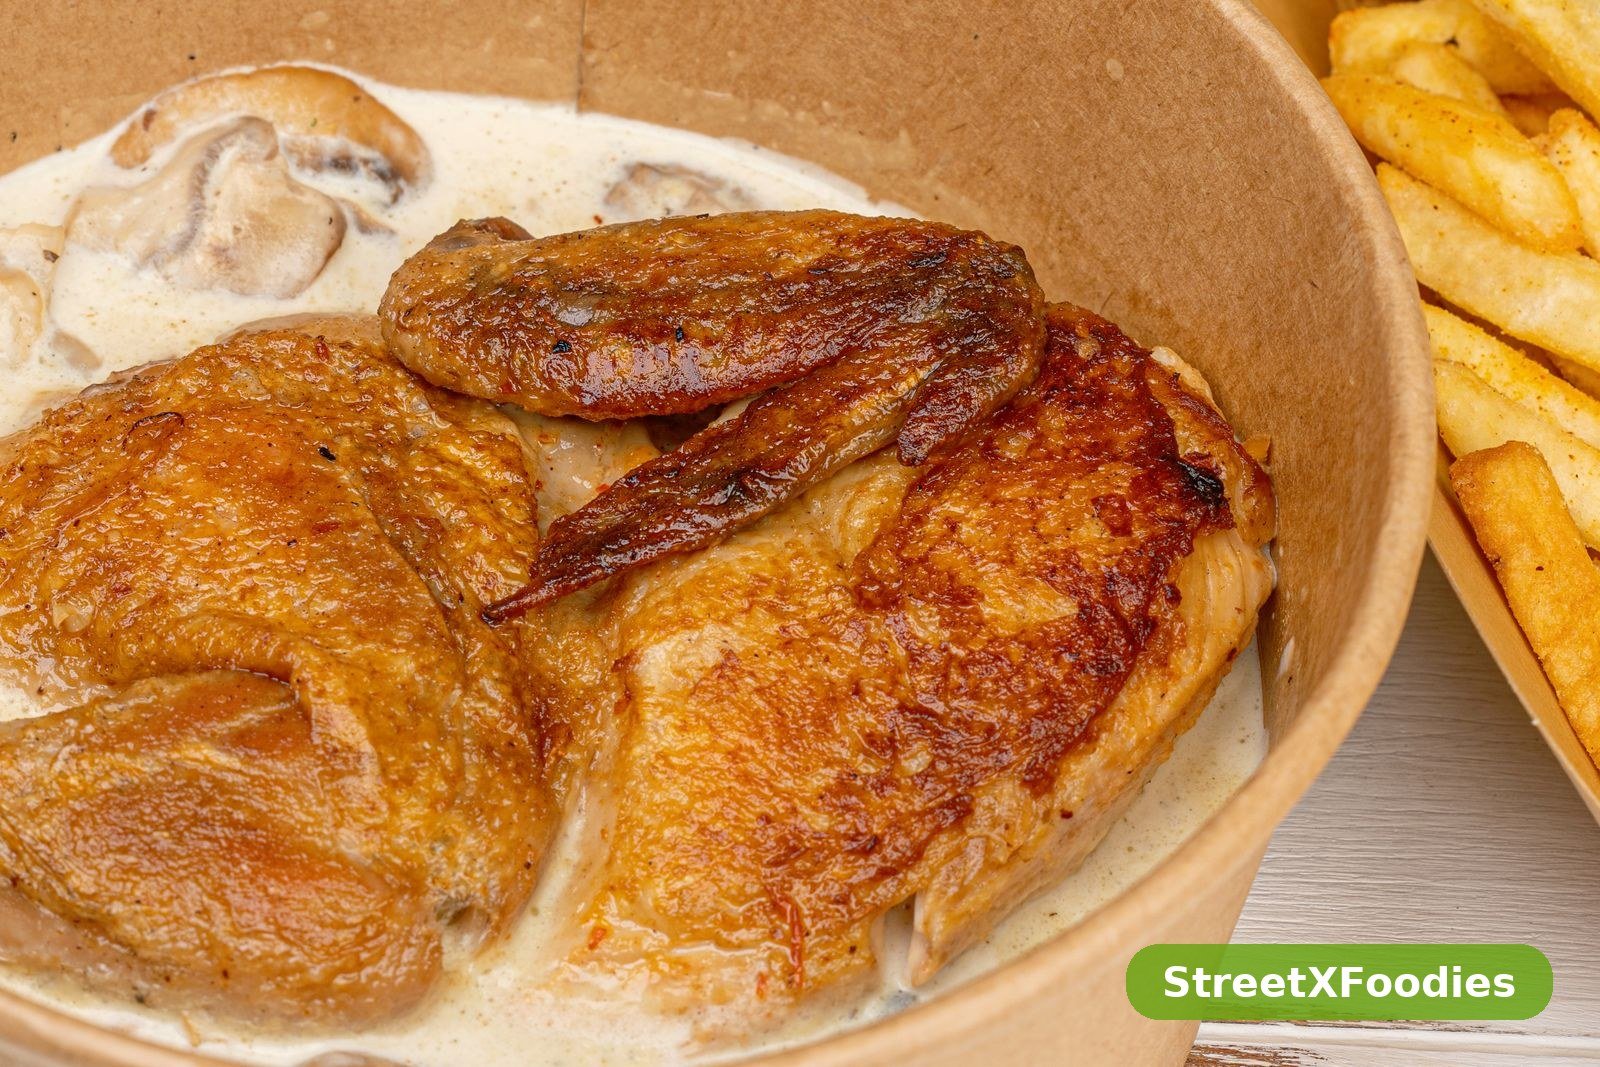
Chicken Marsala is one of those dishes that sounds like it belongs in a restaurant with white tablecloths, but honestly, it’s one of the easiest impressive dinners you can make at home. The first time I cooked it, I was a little nervous — Marsala wine, mushrooms, cream, it all sounded like the kind of thing that could go wrong in a dozen ways. But what actually happened was that the whole thing came together in one pan in about forty minutes, and my family sat there quietly eating it in the way that tells you it’s a keeper before anyone says a word.
There’s a reason this dish has been a restaurant favourite for so long. It’s built on simple, honest ideas: chicken browned properly in a hot pan, mushrooms cooked until they’re golden and deeply savoury, and a sauce that balances the sweetness of Marsala wine with the richness of cream. Nothing in it is complicated on its own, but together they make something that tastes like you know what you’re doing in the kitchen — even on a night when you’re mostly winging it.
What I like most about making Marsala at home is that you control everything. Restaurant versions can be heavy, swimming in butter and cream until the chicken is an afterthought. At home, you can keep the sauce silky without drowning the plate, use a proper amount of mushrooms so they actually matter, and season it the way you like it. And the whole thing is fast enough for a weeknight but special enough for guests, which is a rare combination.
If you’ve never cooked with Marsala wine before, don’t let it put you off. It’s a fortified wine from Sicily, sweet and nutty, and you can find a bottle in most supermarkets for not much money. A bottle lasts ages in the cupboard, and once you’ve used it for this, you’ll find yourself reaching for it again — it’s wonderful in sauces and even in desserts. This version adds a splash of cream, which isn’t in every traditional recipe, but I think it rounds the sauce out beautifully and makes it the kind of thing you want to mop up with bread.
The sauce is the star, and it’s the kind of sauce that makes people reach for bread before they’ve finished their chicken. The Marsala wine cooks down into something sweet and nutty, the mushrooms add a deep earthy savouriness, and the cream ties it all together into a glossy, golden sauce that coats everything it touches. It’s rich without being heavy, and it tastes like it took far longer to make than it actually did.
It’s also a genuine one-pan meal, which matters on a busy evening. The chicken browns in the pan, the mushrooms cook in the same pan, and the sauce builds right there in all those lovely browned bits left behind. You don’t need a second pot or a pile of dishes. From the moment you start to the moment you sit down, it’s about forty minutes, and most of that is just the chicken simmering gently while you set the table.
This recipe is forgiving too. If your sauce is a little thin, you let it simmer a minute longer. If it’s a little thick, a splash of stock loosens it. If you don’t have cream, you can use half and half or even a little butter instead. And the chicken itself — thinly pounded cutlets — cooks quickly and evenly, so you’re not standing over the pan wondering whether the middle is done. It’s the kind of cooking that rewards you for just getting on with it.
And it looks the part. A plate of golden chicken with glossy mushroom sauce spooned over the top, a sprinkle of fresh parsley, maybe some mashed potatoes alongside — it looks like a dinner you’d pay good money for. Serve it when friends come over and they’ll think you spent the afternoon on it. You don’t have to tell them it was forty minutes and one pan.
Start by preparing the chicken. Lay each breast between two sheets of cling film or inside a sturdy zip bag and pound it gently with a rolling pin or the flat side of a meat mallet until it’s about 1 cm (just under half an inch) thick all over. This isn’t about being aggressive — you’re evening it out, not flattening it into paper. Even thickness means even cooking, so the thin end doesn’t dry out while the thick end catches up. It’s the single best thing you can do for chicken breast, and it takes about two minutes per piece.
Now set up a shallow plate with the flour, salt, pepper, and garlic powder mixed together. Pat the chicken dry, then dredge each piece in the seasoned flour, pressing lightly so a thin, even coating sticks. Shake off the excess — you want a light dusting, not a thick crust. Too much flour and the coating turns gummy; too little and you lose that golden colour. Set the floured chicken aside on a plate while you heat the pan.
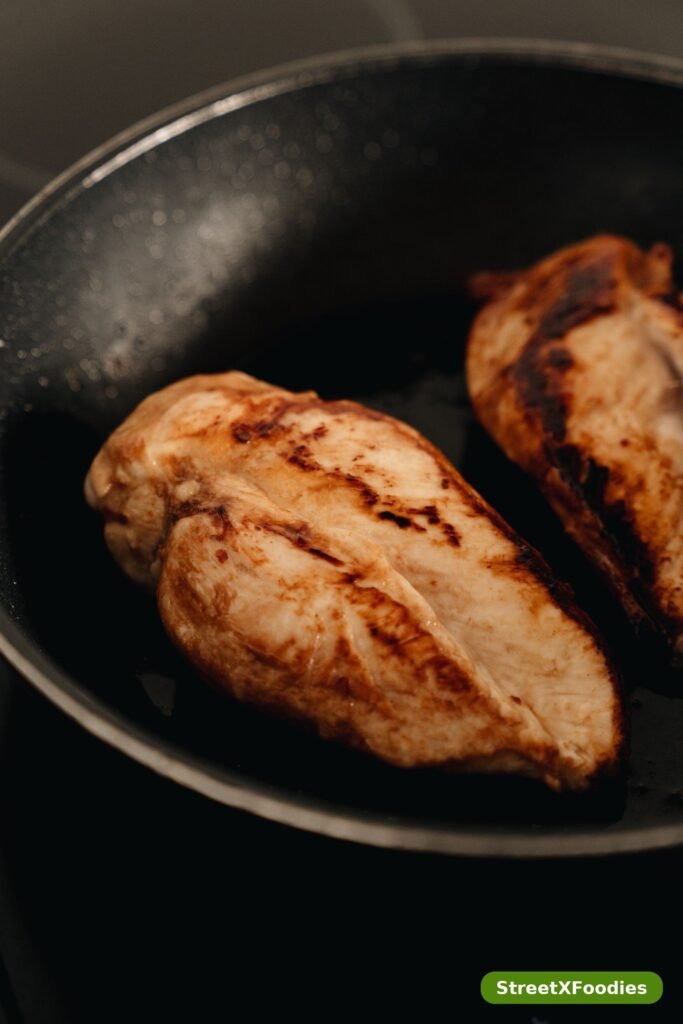
Heat the olive oil and one tablespoon of the butter in a large, wide skillet over medium-high heat. When the butter is foaming and the oil is shimmering, lay the chicken in the pan — don’t crowd it, or the chicken will steam instead of browning. Two at a time is fine if your pan is small. Let each piece cook undisturbed for about four minutes per side until it’s deeply golden and crisp at the edges. Resist the urge to move it around; that golden crust forms when the chicken sits still against the hot pan. When both sides are done, transfer the chicken to a plate and cover it loosely with foil. It doesn’t need to be cooked all the way through yet — it will finish in the sauce.
In the same pan, with all those beautiful browned bits still in there, add the remaining butter and the sliced mushrooms. Spread them out in a single layer and leave them alone for a few minutes. Mushrooms release water when they first hit the pan, and if you stir them constantly they’ll just simmer in their own liquid and stay pale. Leave them be, and once the water cooks off they’ll start to brown properly — that’s when the deep, savoury flavour develops. After about five or six minutes, when they’re golden and a bit shrunken, stir in the shallot and garlic and cook for another minute until fragrant.
Now pour in the Marsala wine. It will sizzle and steam, and that’s exactly what you want. Use a wooden spoon to scrape up all the browned bits from the bottom of the pan — that’s pure flavour, and the wine dissolves it right into the sauce. Let the wine bubble and reduce by about half, which takes two or three minutes. Then pour in the chicken stock and the thyme, bring it to a gentle simmer, and let it cook for three or four minutes so the flavours come together and the sauce starts to thicken slightly.
Turn the heat down to medium-low and stir in the cream and the Dijon mustard if you’re using it. Slide the chicken back into the pan, nestling it into the sauce and spooning some of the mushrooms over the top. Let everything simmer gently for five to seven minutes, until the chicken is cooked through — 74°C (165°F) inside — and the sauce has thickened to a silky consistency that coats the back of a spoon. Taste and adjust: a pinch more salt, a squeeze of lemon juice to brighten it, maybe a crack of pepper. Scatter the parsley over the top and serve it straight from the pan.
Pound the chicken evenly. I know I keep coming back to this, but it really is the difference between chicken that’s juicy all the way through and chicken that’s dry at one end and undercooked at the other. Take the two minutes. Put on a podcast, flatten the breasts, and thank yourself later. If you don’t have a mallet, a rolling pin, a heavy pan, or even the bottom of a sturdy glass will do the job.
Don’t crowd the mushrooms. This is the other big one. Mushrooms need space and heat to brown, and a crowded pan turns them grey and soggy. If your pan is on the small side, cook the mushrooms in two batches. It takes an extra few minutes, but golden-brown mushrooms taste completely different from pale, steamed ones — nutty, meaty, and deeply savoury. If you love mushrooms as much as I do, my garlic butter mushrooms with fresh parsley are worth a look on their own.
Use dry Marsala, not sweet. Both are sold in the wine aisle, and the bottles can look very similar. Sweet Marsala will make the sauce taste like dessert — pleasant for a few bites, then cloying. Dry Marsala gives you that nutty, complex flavour without overpowering sweetness, and the cream adds enough richness on its own. If you can’t find Marsala at all, a dry sherry is the closest substitute, though the flavour will be a little different.
Let the wine reduce properly before adding the stock. If you pour the stock in too early, the sauce will taste raw and boozy because the alcohol hasn’t had time to cook off. Give the Marsala two or three minutes of bubbling on its own — you’ll smell the change as the sharp alcoholic edge disappears and the nutty sweetness comes forward. That’s when you know it’s ready for the stock.
And don’t boil the sauce once the cream is in. A gentle simmer is all you need. Hard boiling can split cream sauces, and you’ll end up with a grainy texture instead of a silky one. Keep the heat at medium-low, let it bubble lazily, and the sauce will thicken slowly and evenly.
If you prefer thighs, this sauce works beautifully with boneless, skinless chicken thighs. They take a little longer to cook through — about six minutes per side — but they’re even more forgiving than breast and they stay juicy in the sauce. Just brown them the same way and finish them in the Marsala sauce.
For a lighter version, skip the cream and finish the sauce with an extra tablespoon of butter swirled in at the end. The sauce will be thinner and more wine-forward, closer to the traditional Italian-American style, and still absolutely delicious. Or use half and half instead of double cream for something in between. If you’re after a smokier chicken dish instead, the smoky paprika chicken thighs with roasted peppers on this site take a completely different, bolder direction.
You can also change up the mushrooms. A mix of cremini and shiitake adds a lovely depth, and a handful of dried porcini soaked in warm water (with the soaking liquid added to the sauce) gives it an almost meaty richness. Portobello mushrooms, sliced thick, work too. Just avoid plain white button mushrooms if you can — they’re fine, but they don’t bring the same flavour.
For a vegetarian version, use thick slices of portobello mushroom or a couple of large cauliflower steaks in place of the chicken. Dredge and brown them the same way, then simmer them in the sauce until tender. The Marsala-mushroom-cream combination is so good that it hardly needs the chicken at all — and it makes a wonderful dinner for a mixed table where some people eat meat and some don’t.
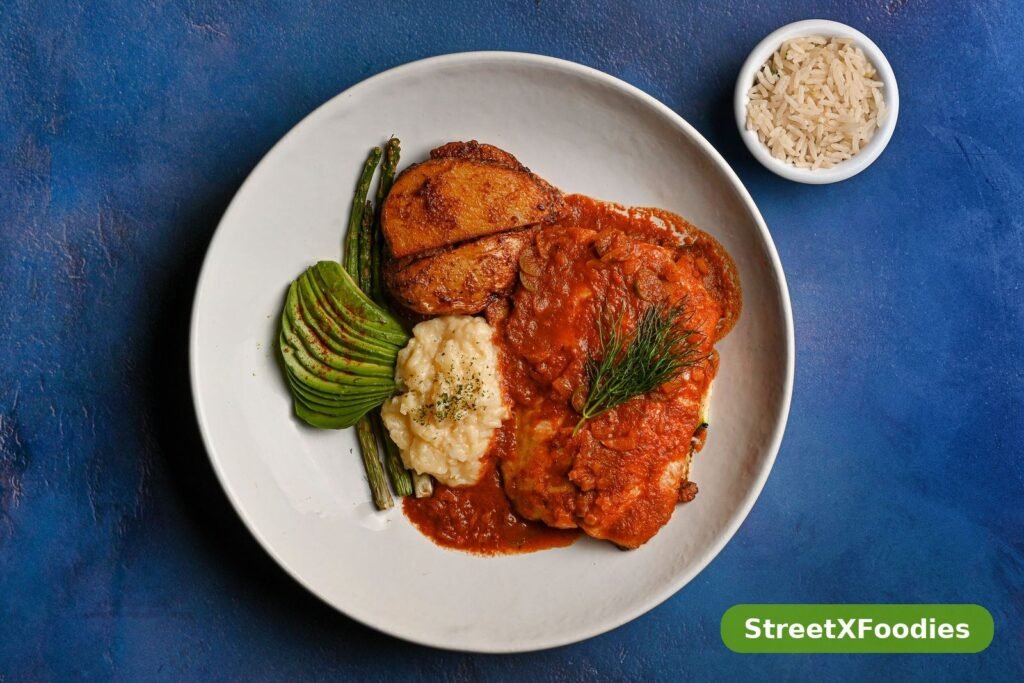
Mashed potatoes are the classic partner, and for good reason. Something soft and buttery to soak up that sauce is exactly what this dish wants. Make them properly fluffy with plenty of butter and a splash of milk, and spoon the chicken and sauce right over the top. It’s comfort food at its best, and it’s the way I’d serve this to guests every time.
Pasta is another natural match. Wide noodles like tagliatelle or pappardelle catch the sauce beautifully, and a simple buttered pasta lets the Marsala flavour shine. Cook the pasta while the chicken simmers, toss it with a little of the sauce, and serve the chicken on top with extra mushrooms spooned over. For a lighter plate, try it with crusty bread and a simple green salad — the bread is for the sauce, obviously, and you will want a lot of it.
If you’re serving a crowd, add a vegetable side that can stand up to the richness. Roasted green beans with a little garlic, or steamed broccoli with lemon, both work well. A simple rocket salad with shaved parmesan and a lemon dressing cuts through the cream nicely and adds a fresh, peppery note. And if you want more chicken dinner ideas for the week, my chicken street food recipes for dinner have plenty of bolder, spicier options.
A glass of the same Marsala you cooked with is a lovely touch if you drink wine — or just a cold sparkling water with lemon. Keep the rest of the meal simple and let the chicken be the star of the table.
Leftover chicken Marsala keeps in the fridge for three days in an airtight container. The sauce will thicken as it cools, which is completely normal — it loosens again when you reheat it. Store the chicken in the sauce if you can, because it keeps the meat moist and the flavours continue to develop overnight. Honestly, day-two Marsala is sometimes even better than day one.
To reheat, warm it gently in a covered pan over low heat for about ten minutes, until the chicken is hot all the way through. Add a splash of chicken stock or a spoonful of cream if the sauce is too thick. Avoid the microwave if you can — it heats unevenly and the sauce can split. If you do use it, heat in short bursts at medium power and stir the sauce between bursts.
This dish doesn’t freeze particularly well because of the cream — cream sauces can turn grainy after freezing and thawing. If you know you’ll have leftovers, it’s better to freeze the cooked chicken and mushrooms without the cream, then make a fresh quick sauce when you reheat. Or just plan to eat the leftovers within a few days; they rarely last that long in my house anyway.
Yes, you can, though the flavour will be different since Marsala is the heart of the dish. The closest substitute is chicken stock with a tablespoon of balsamic vinegar and a pinch of sugar, which gives you some of the sweetness and acidity. Some people use grape juice, but I find it too sweet. If you do skip the wine, add an extra splash of stock and a little more lemon juice at the end to keep the sauce balanced and bright.
Dry Marsala is less sweet and more nutty and savoury, which makes it right for cooking savoury dishes like this one. Sweet Marsala is richer and sweeter, and it’s traditionally used in desserts like zabaglione. For chicken Marsala you want the dry kind — check the label, because the bottles can look almost identical on the shelf. If you accidentally buy sweet, you can still use it, but cut back the cream slightly and add more lemon juice to balance the sweetness.
Absolutely, and many people prefer them. Boneless, skinless thighs stay juicier and they’re harder to overcook, which makes them very forgiving in a pan sauce. Brown them for about six minutes per side, then finish them in the sauce the same way. Bone-in thighs work too, but they need longer in the sauce — about fifteen minutes of gentle simmering — and you’ll want to check they’re cooked through near the bone. For more ideas on cooking with thighs and breasts alike, the BBC’s chicken recipes collection is a handy place to browse.
The most common reason is that the sauce didn’t simmer long enough after the stock went in. Let it bubble gently for a few extra minutes and it will reduce and thicken on its own. The flour from the chicken coating also helps thicken it, so make sure you’re dredging the chicken properly. If it’s still too thin, you can mix a teaspoon of cornflour with a tablespoon of cold water and stir it in, then simmer for a minute. Don’t add raw flour directly to the pan — it will go lumpy.
Yes, and it’s a great dinner-party dish for exactly that reason. You can cook the whole thing a few hours ahead, let it cool, and keep it covered in the fridge. Reheat it gently in a covered pan over low heat, adding a splash of stock if the sauce has thickened too much. The chicken actually benefits from sitting in the sauce. Just don’t leave it on the heat for too long when reheating, or the chicken will overcook. Serious Eats has a detailed chicken Marsala recipe if you’d like to compare techniques and timings.
Plenty of things. Buttered tagliatelle or pappardelle is wonderful, and so is plain rice — the sauce soaks in beautifully. Crusty bread and a green salad make it a lighter meal, and roasted vegetables like green beans or broccoli add colour and crunch. If you want something fun on the side, my homemade crispy chicken bites make a great starter before the main event. Keep the sides simple and let the Marsala sauce do the talking.
Smoky paprika chicken thighs with sweet roasted peppers — juicy, golden, and ready in under an hour. A simple one-pan dinner your whole family will love.